

Description
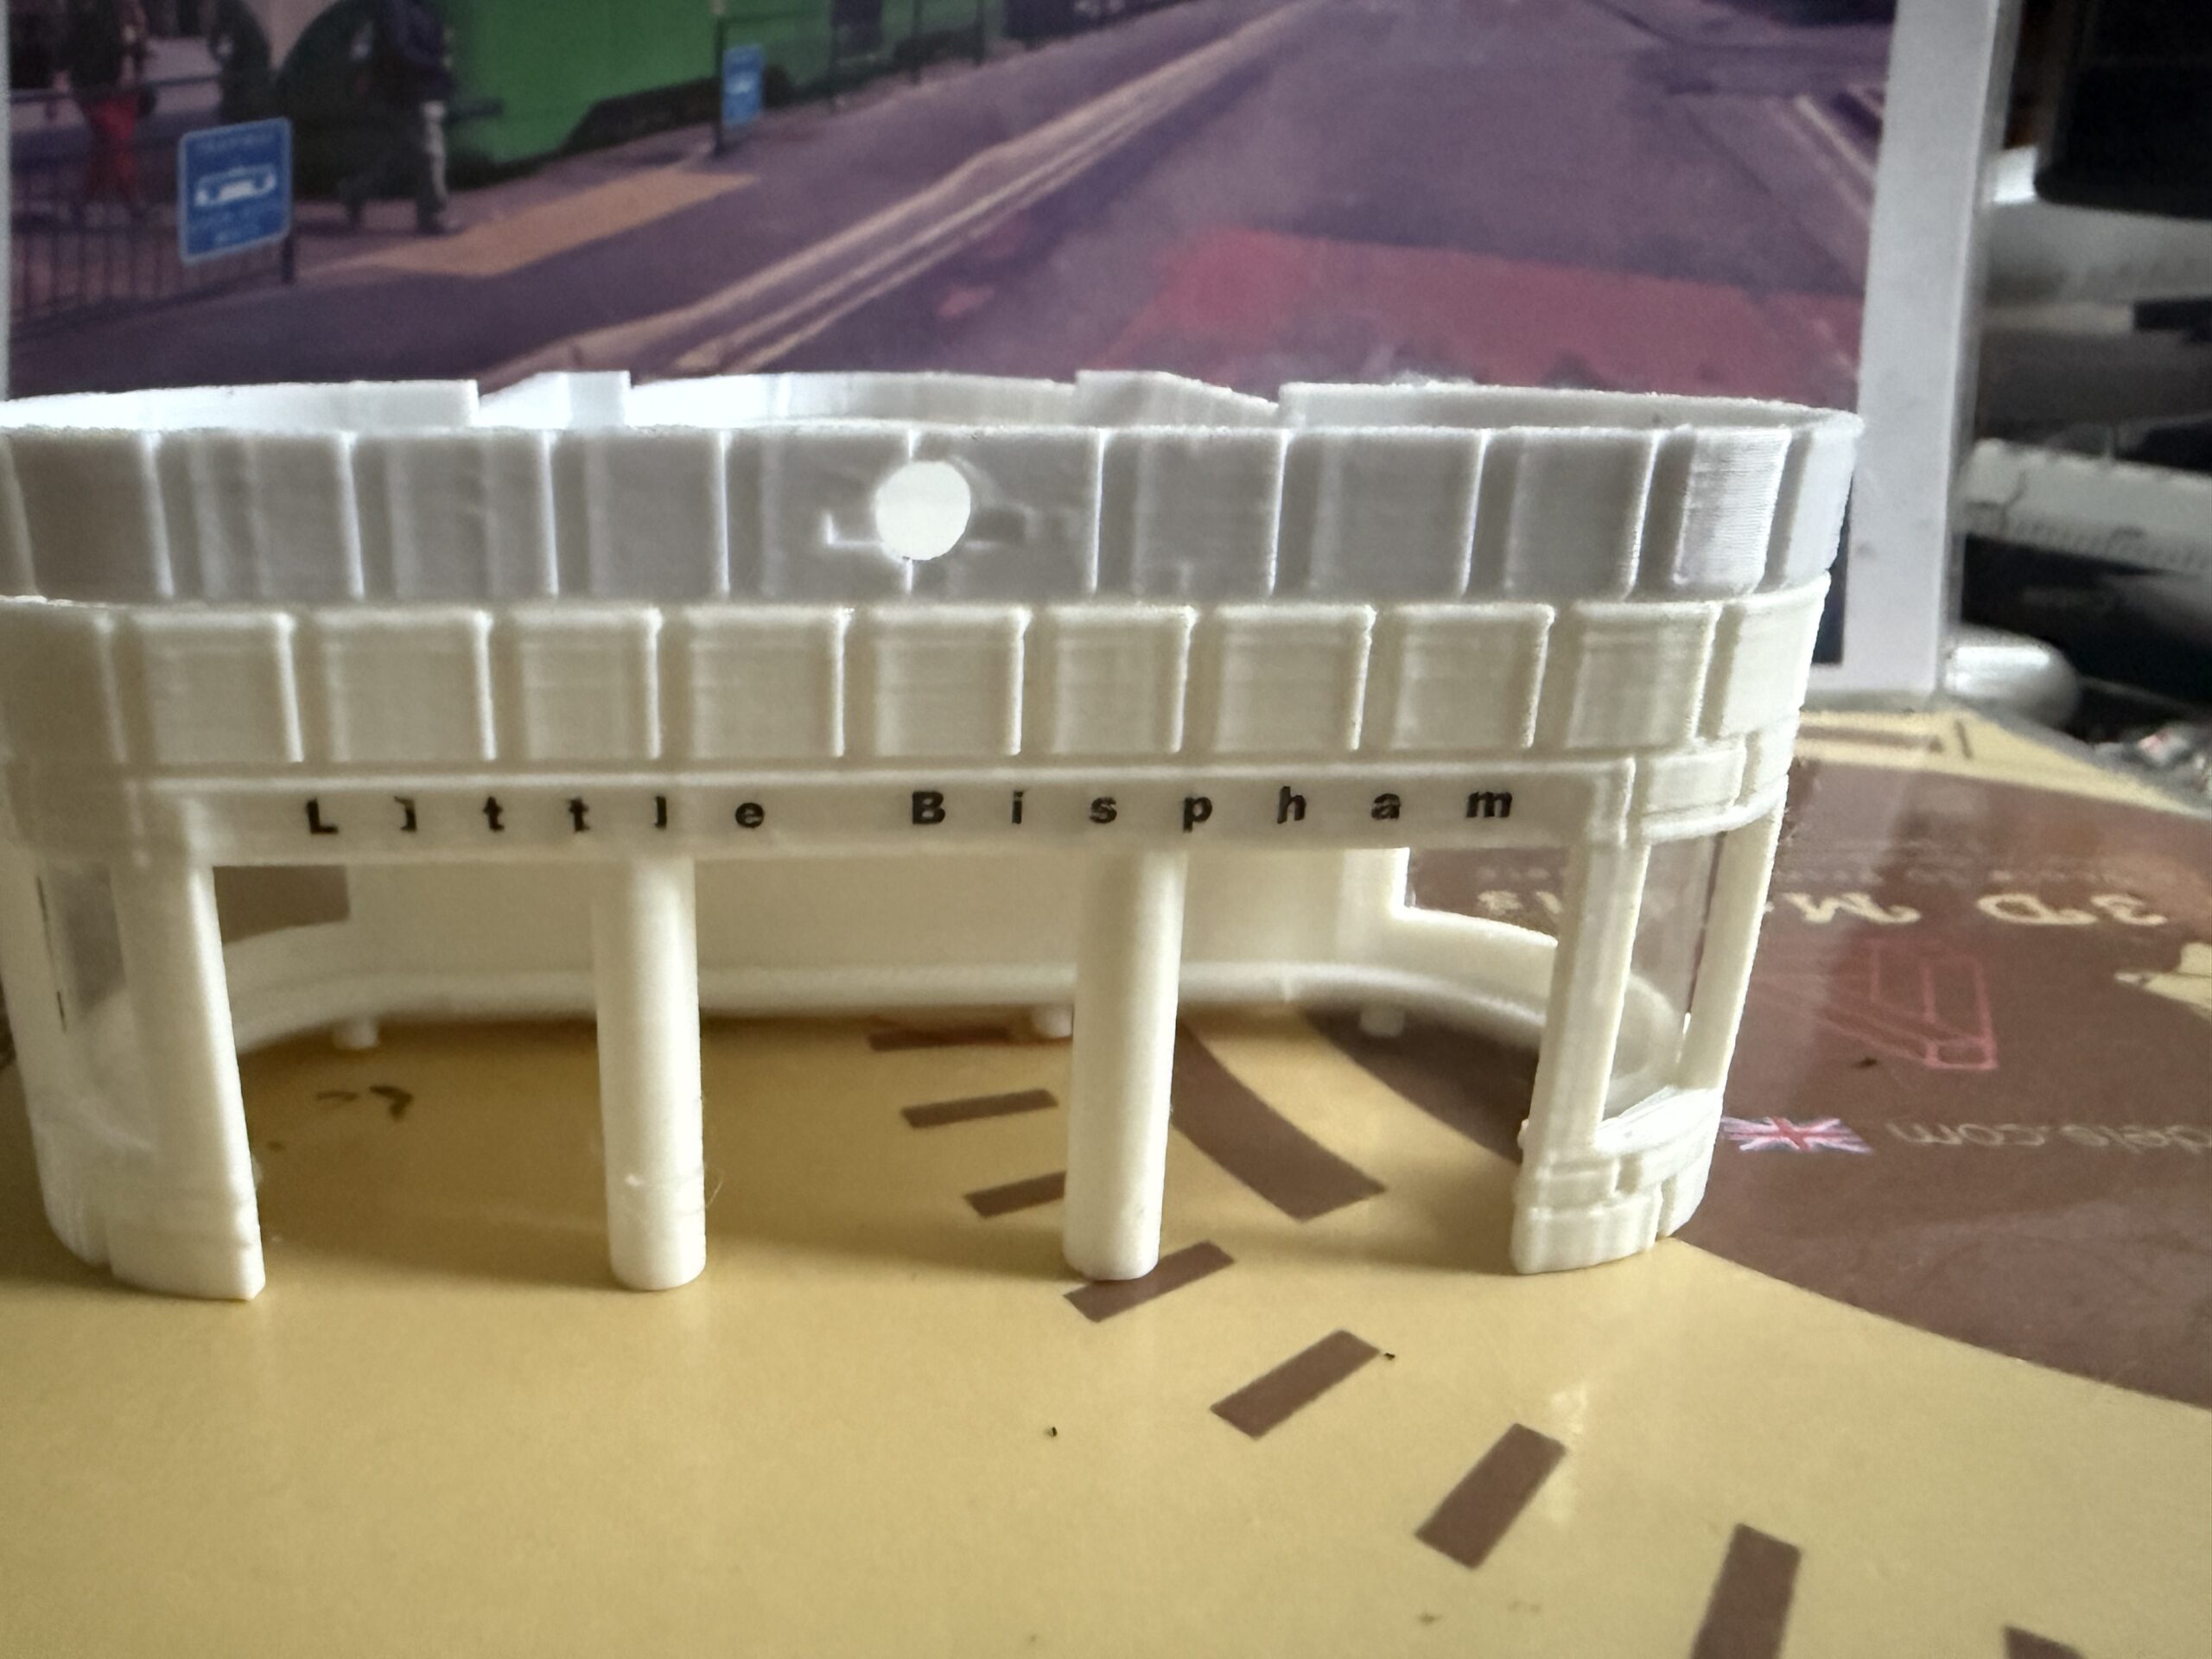
**Blackpool Little Bispham Tram Stop**
We are thrilled to announce the release of our latest product: the **Blackpool Little Bispham Tram Stop** in 1/76 scale, 3D printed in high-quality white PLA with
**Blackpool Little Bispham Tram Stop Selling Page**
**Bring History to Your Display with the Blackpool Little Bispham Tram Stop!**
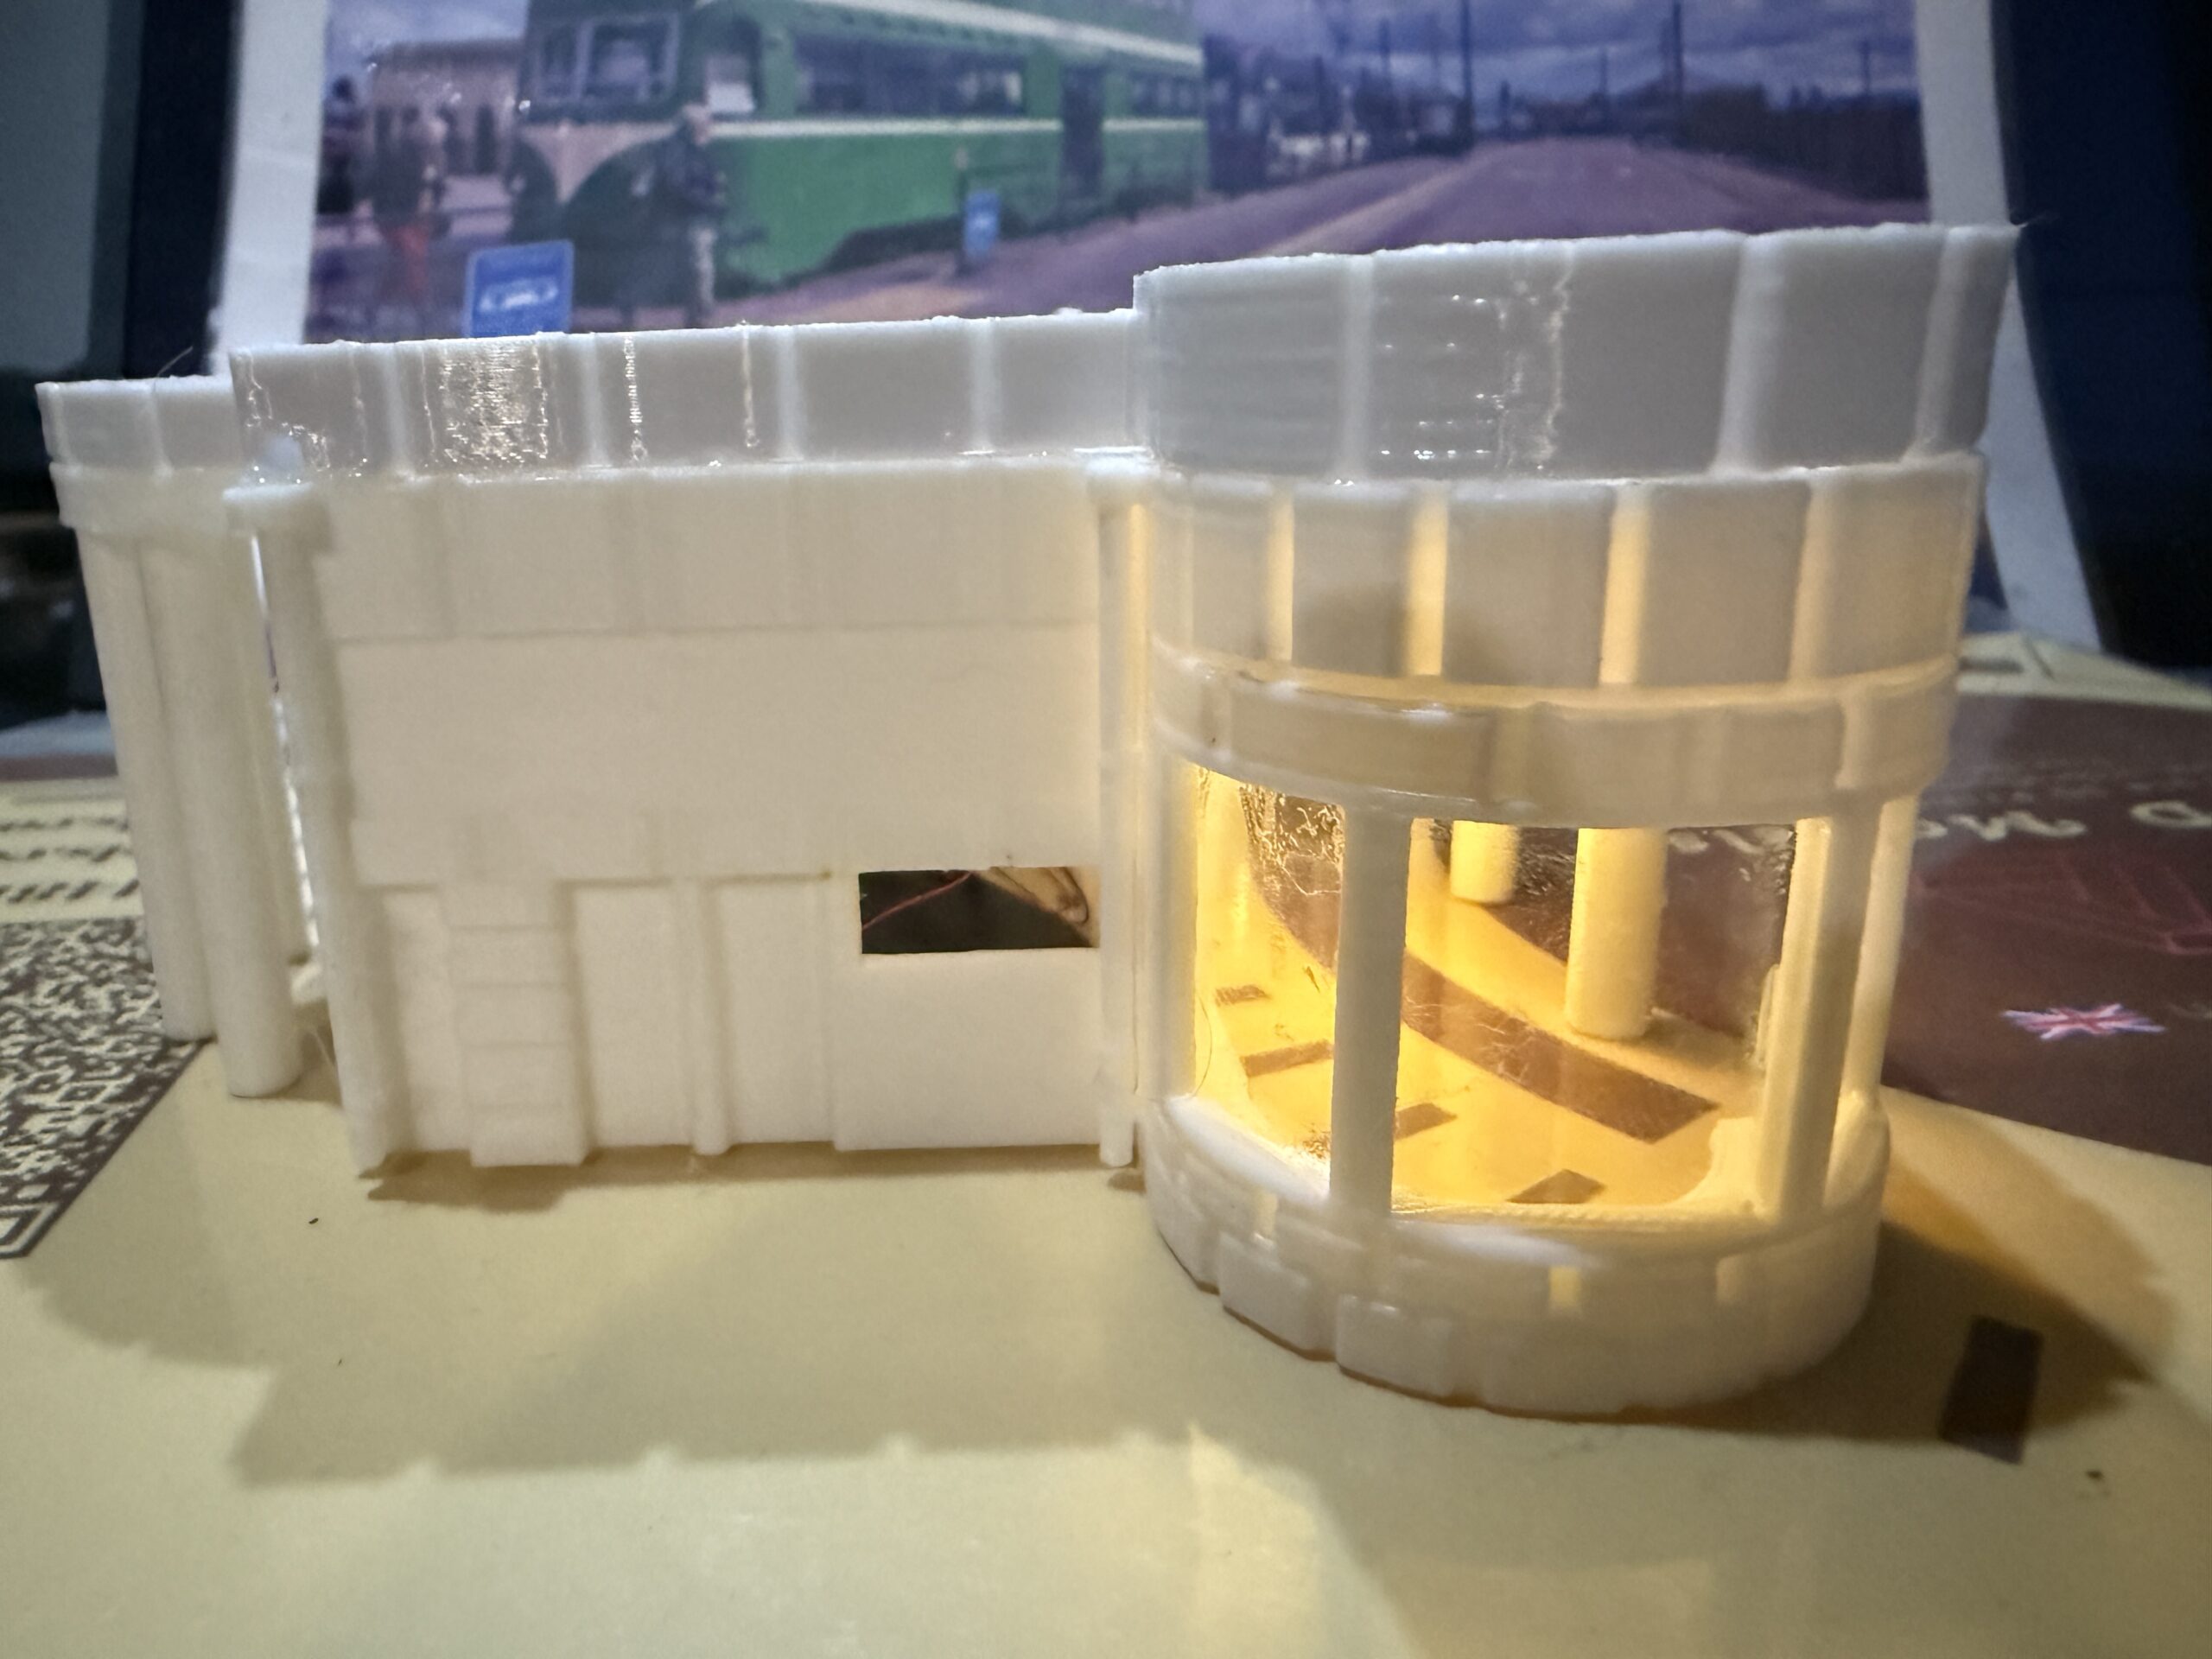
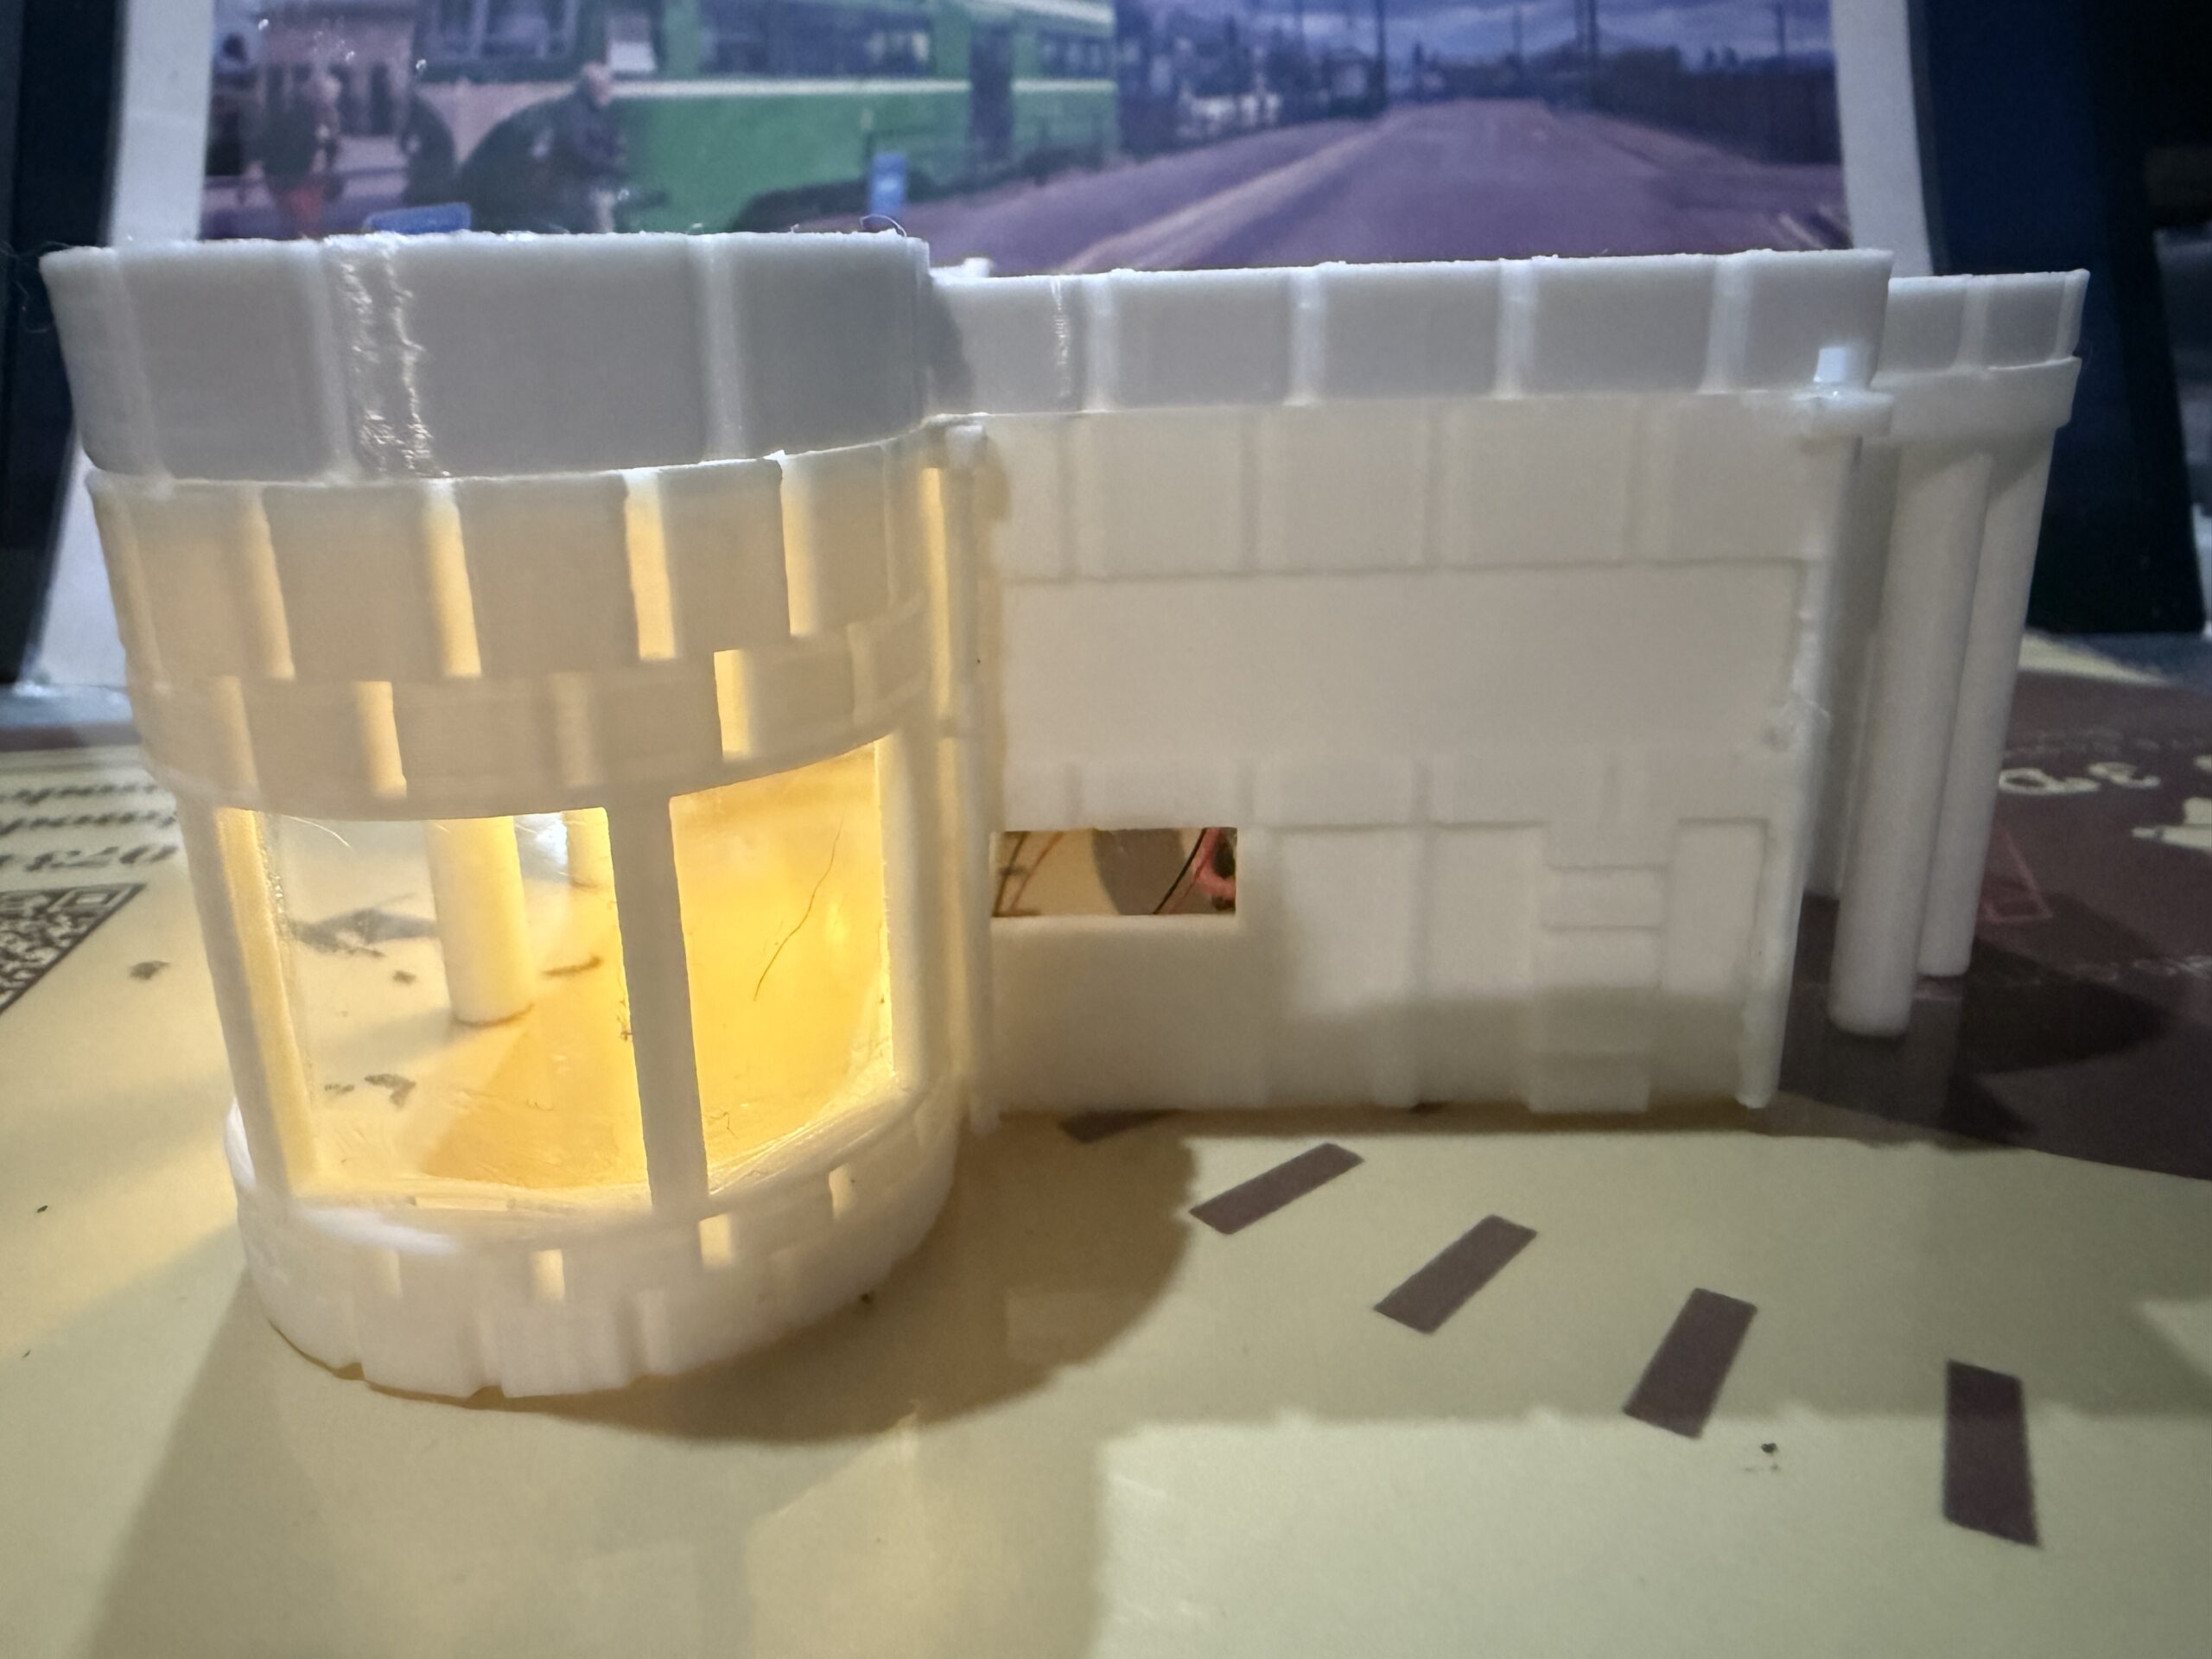
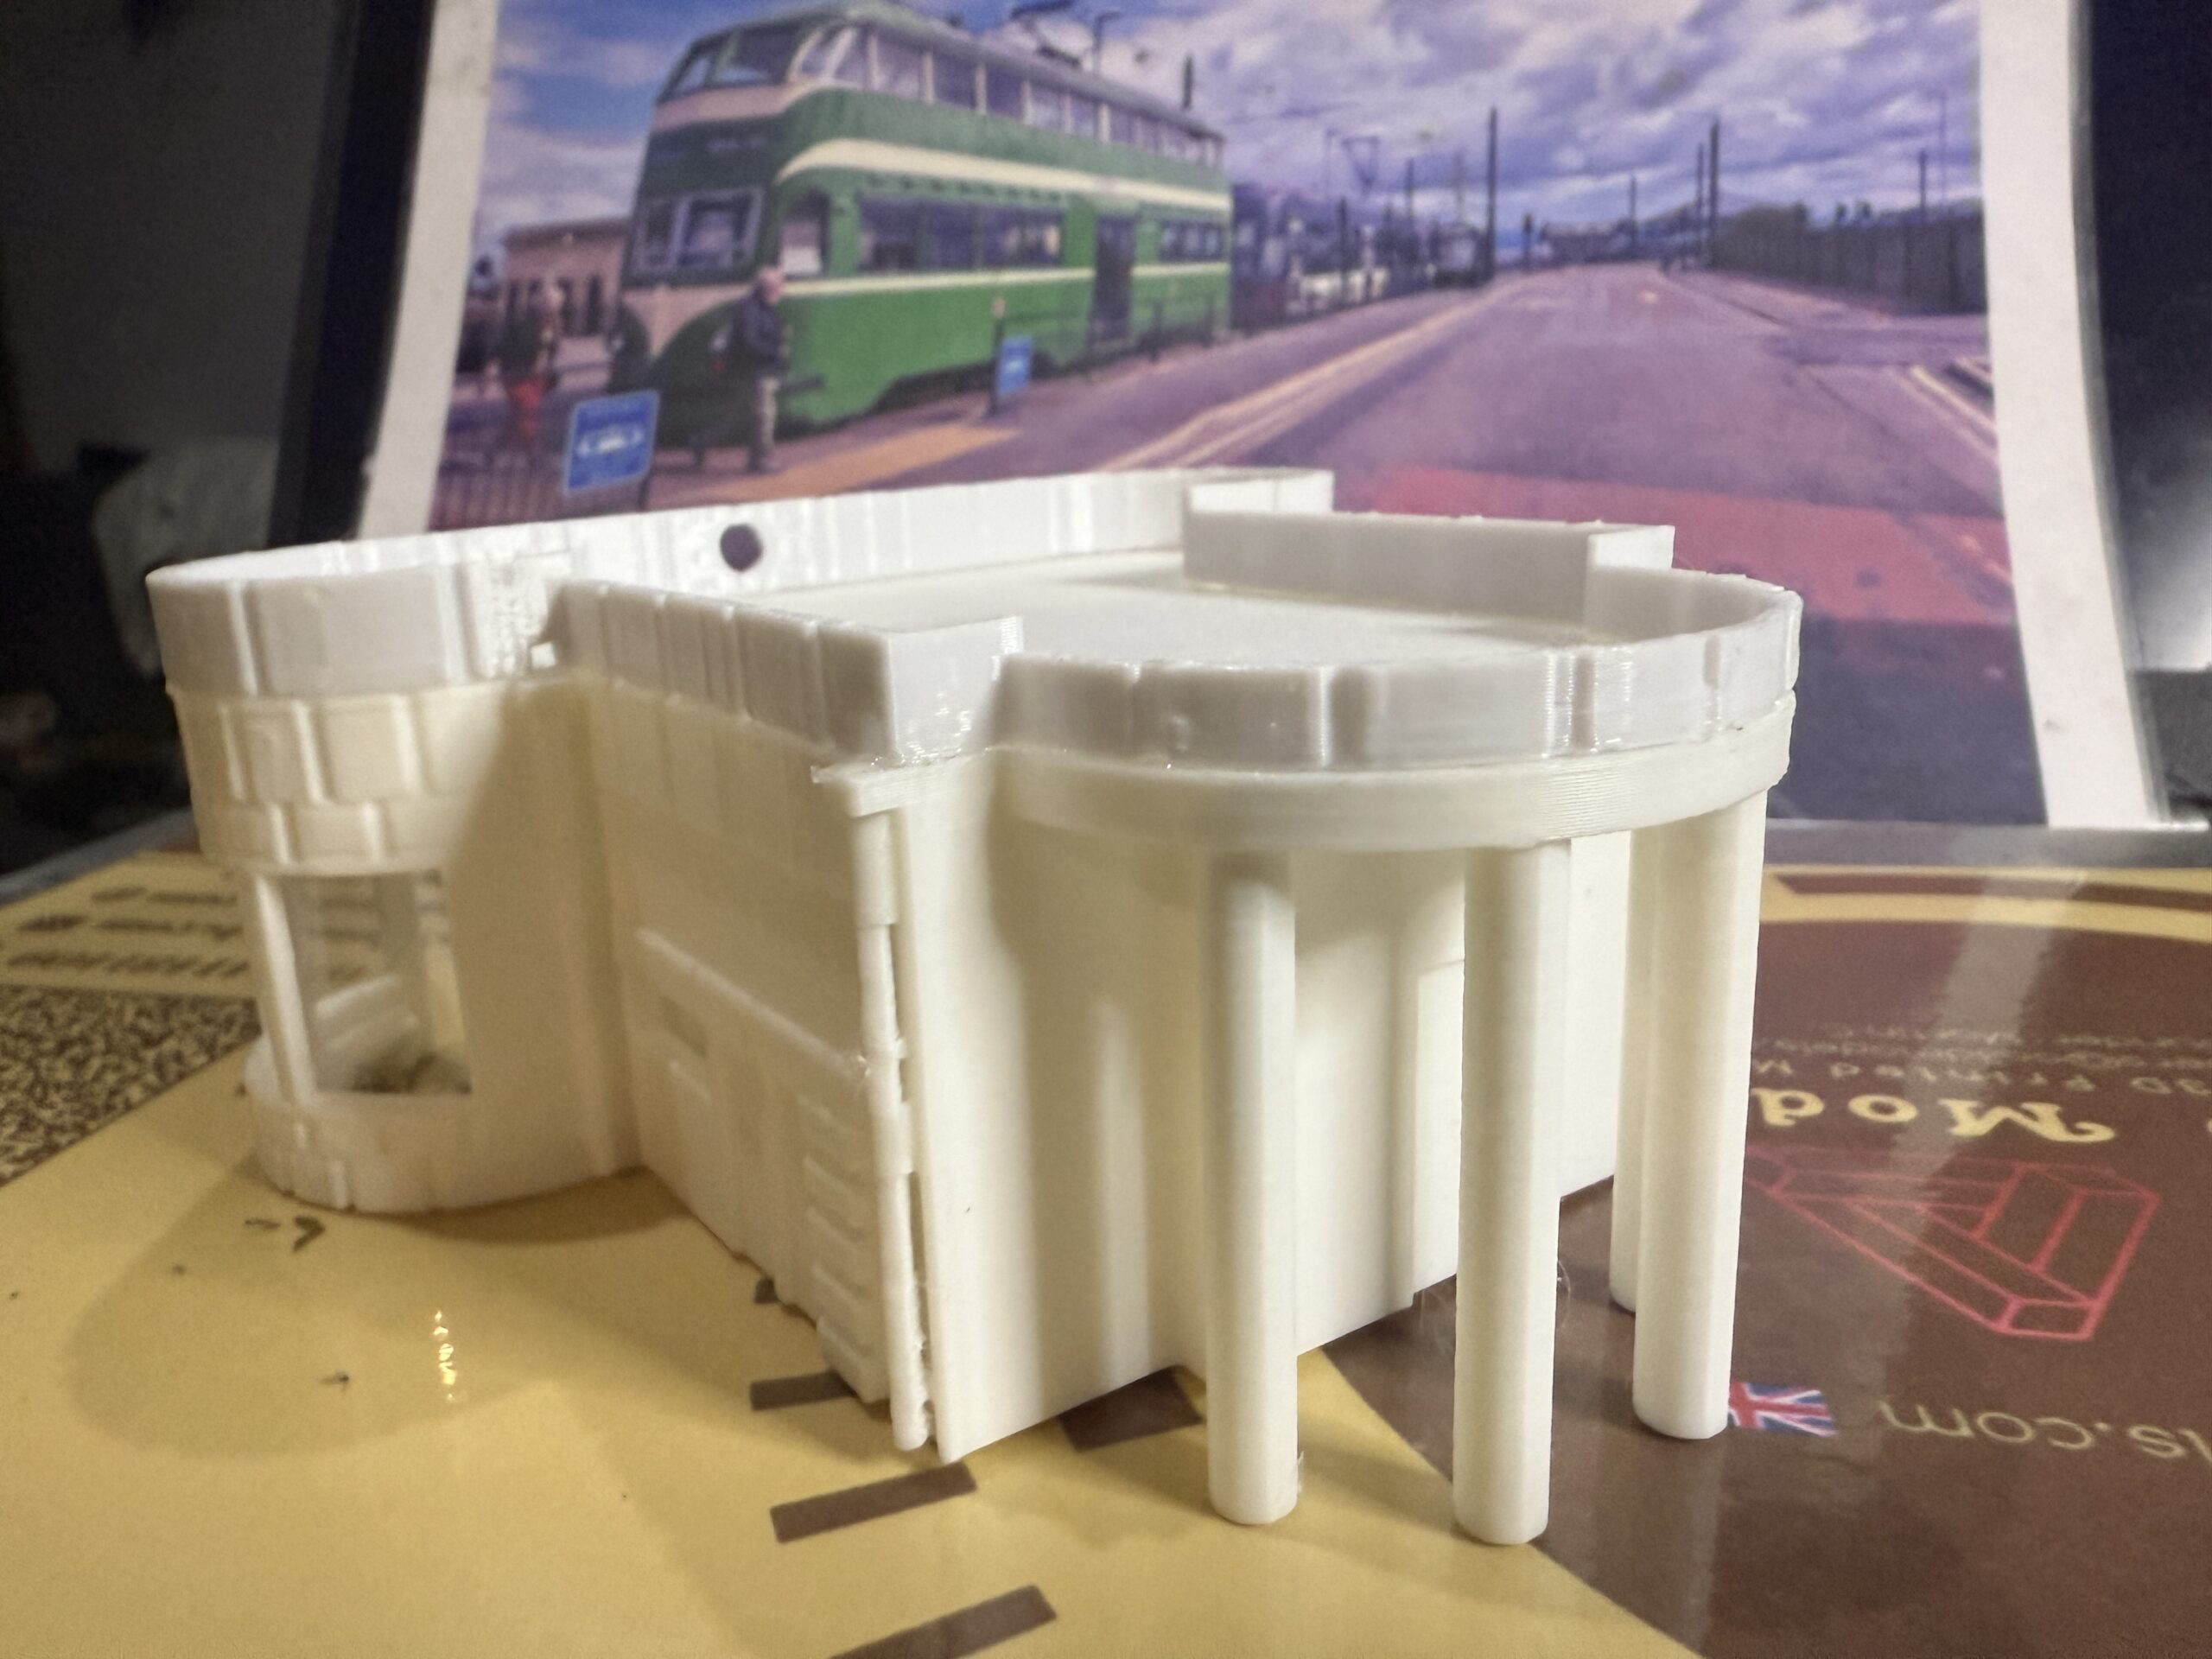
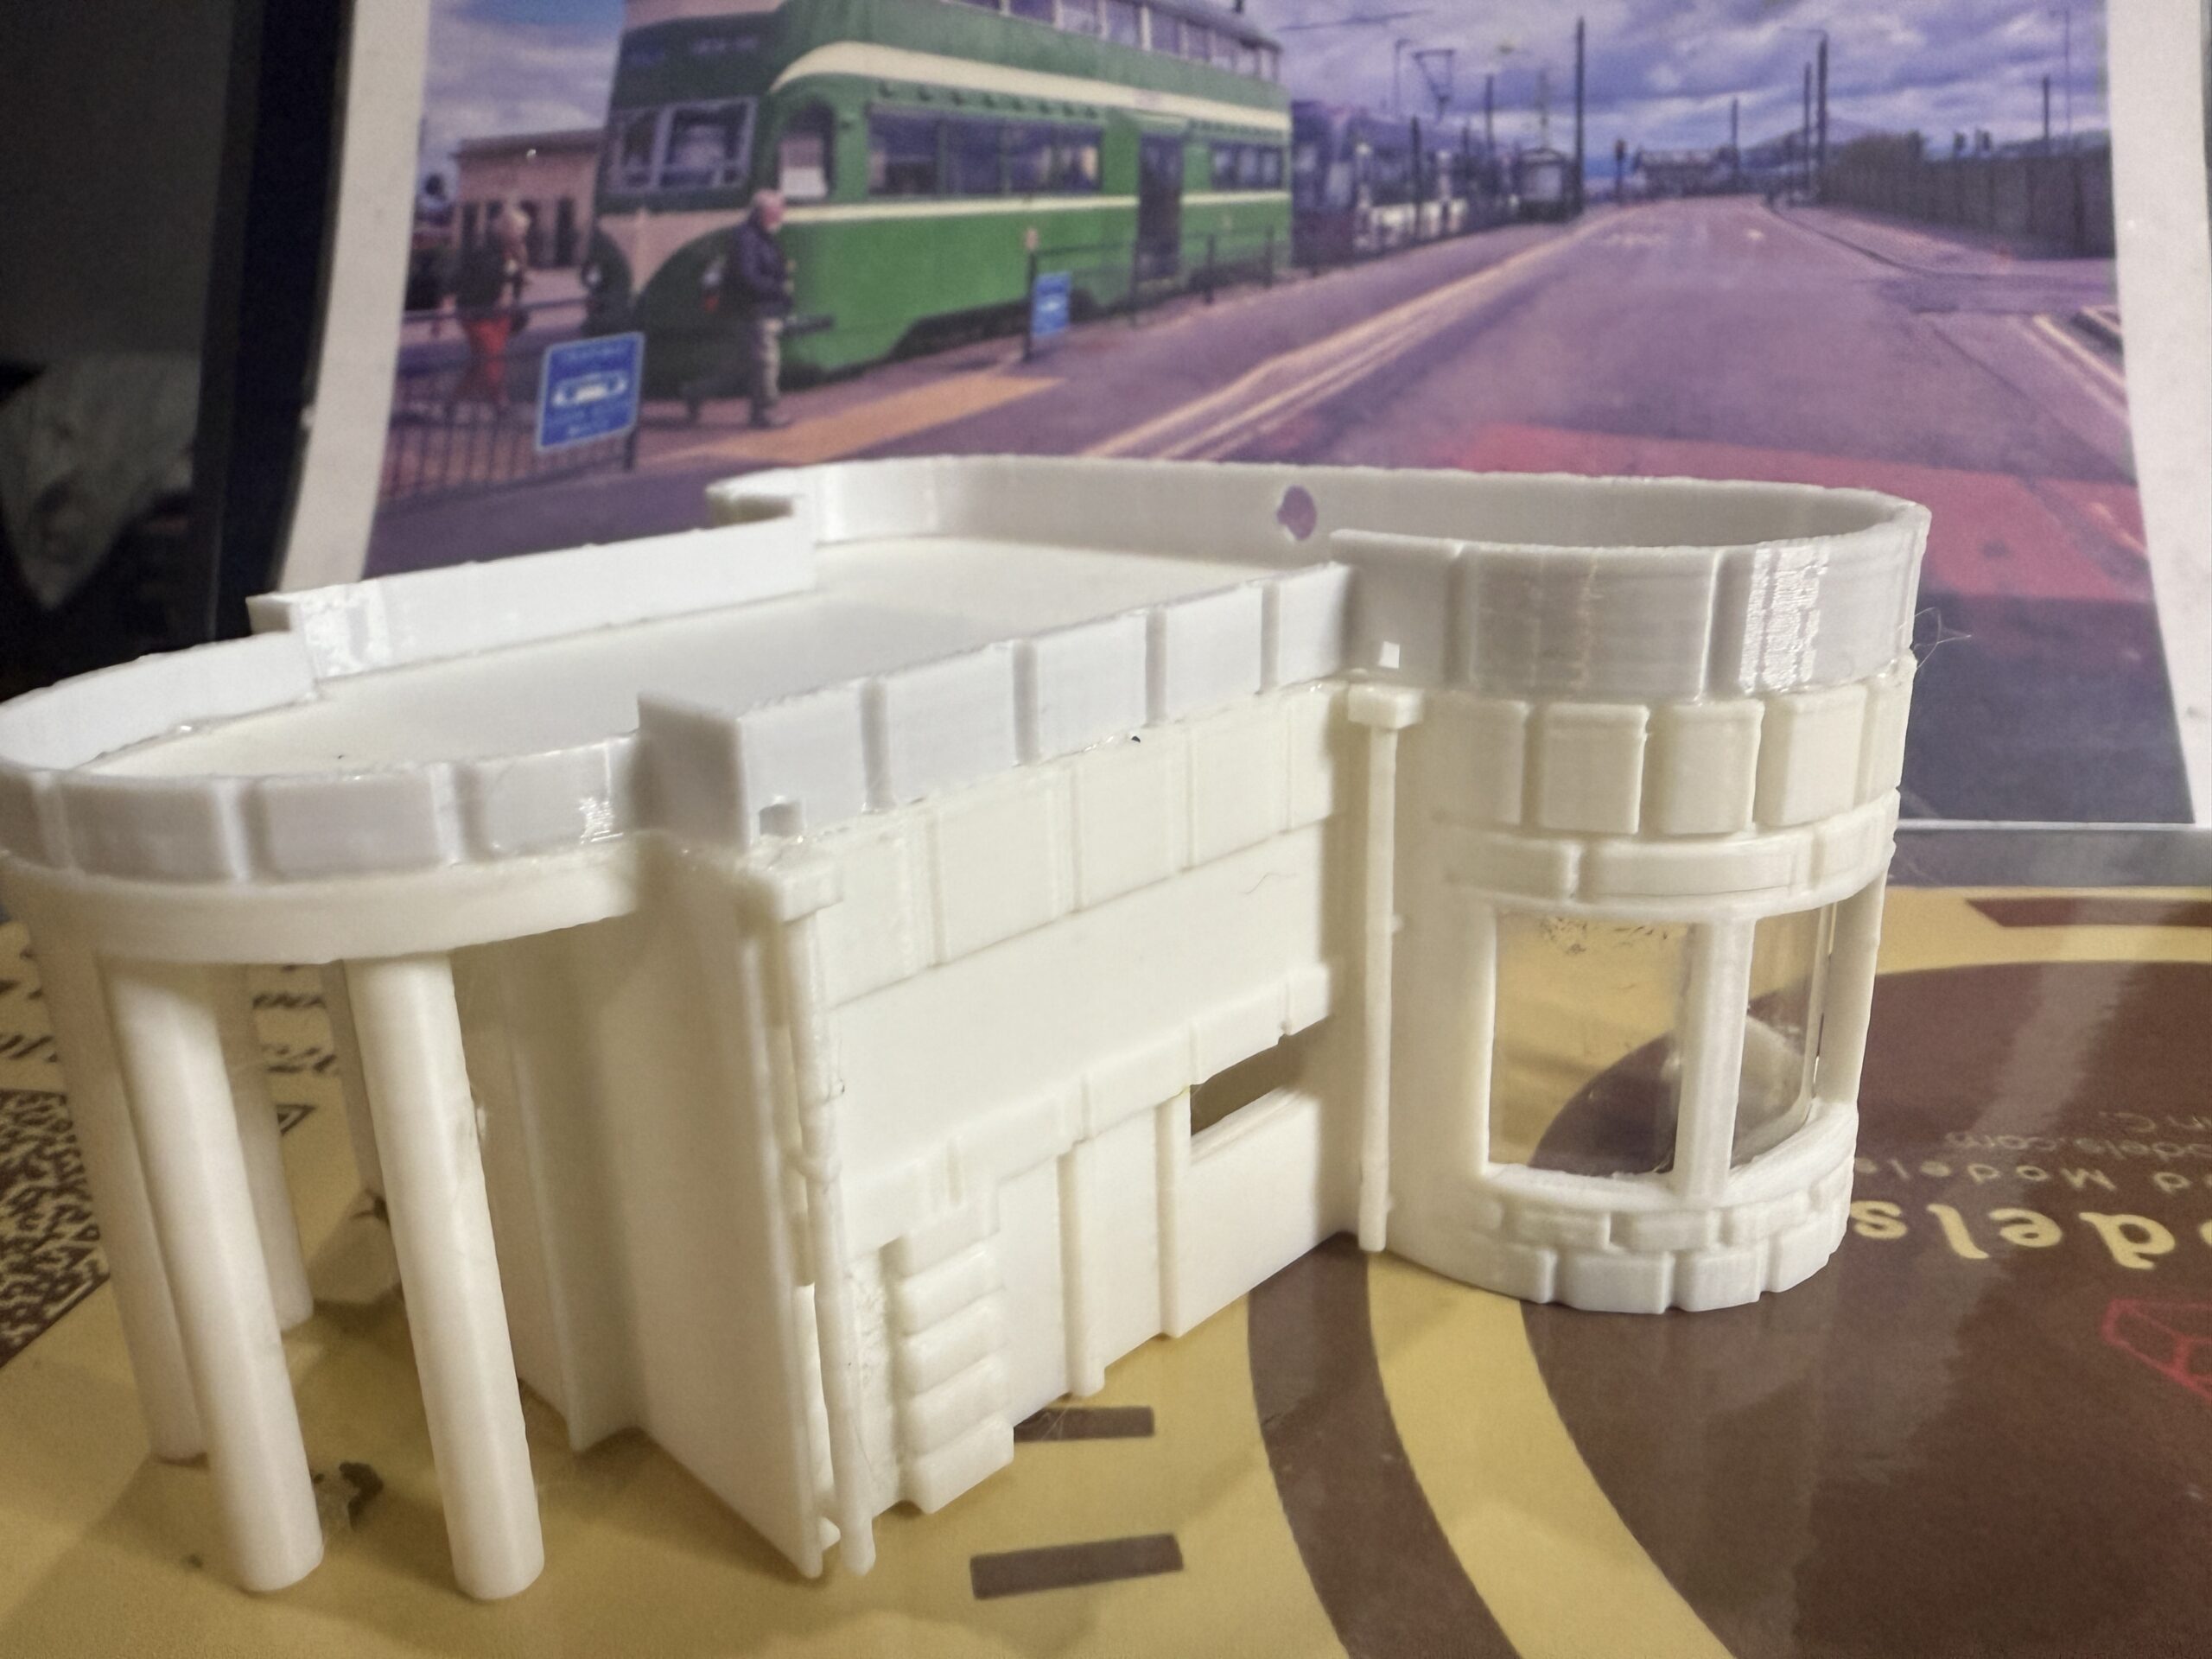
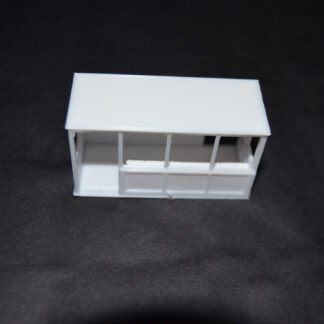
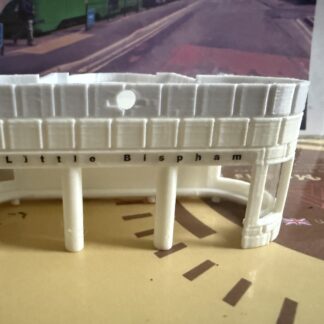
Add a piece of Blackpool’s iconic tramway to your collection with our **1/76 scale Blackpool Little Bispham Tram Stop** model. Crafted with precision and printed in high-quality white PLA, this model includes an LED light to bring your display to life.
**Product Highlights:**
– **Intricate Design:** Features realistic details like integrated stonework and tiny drainpipes.
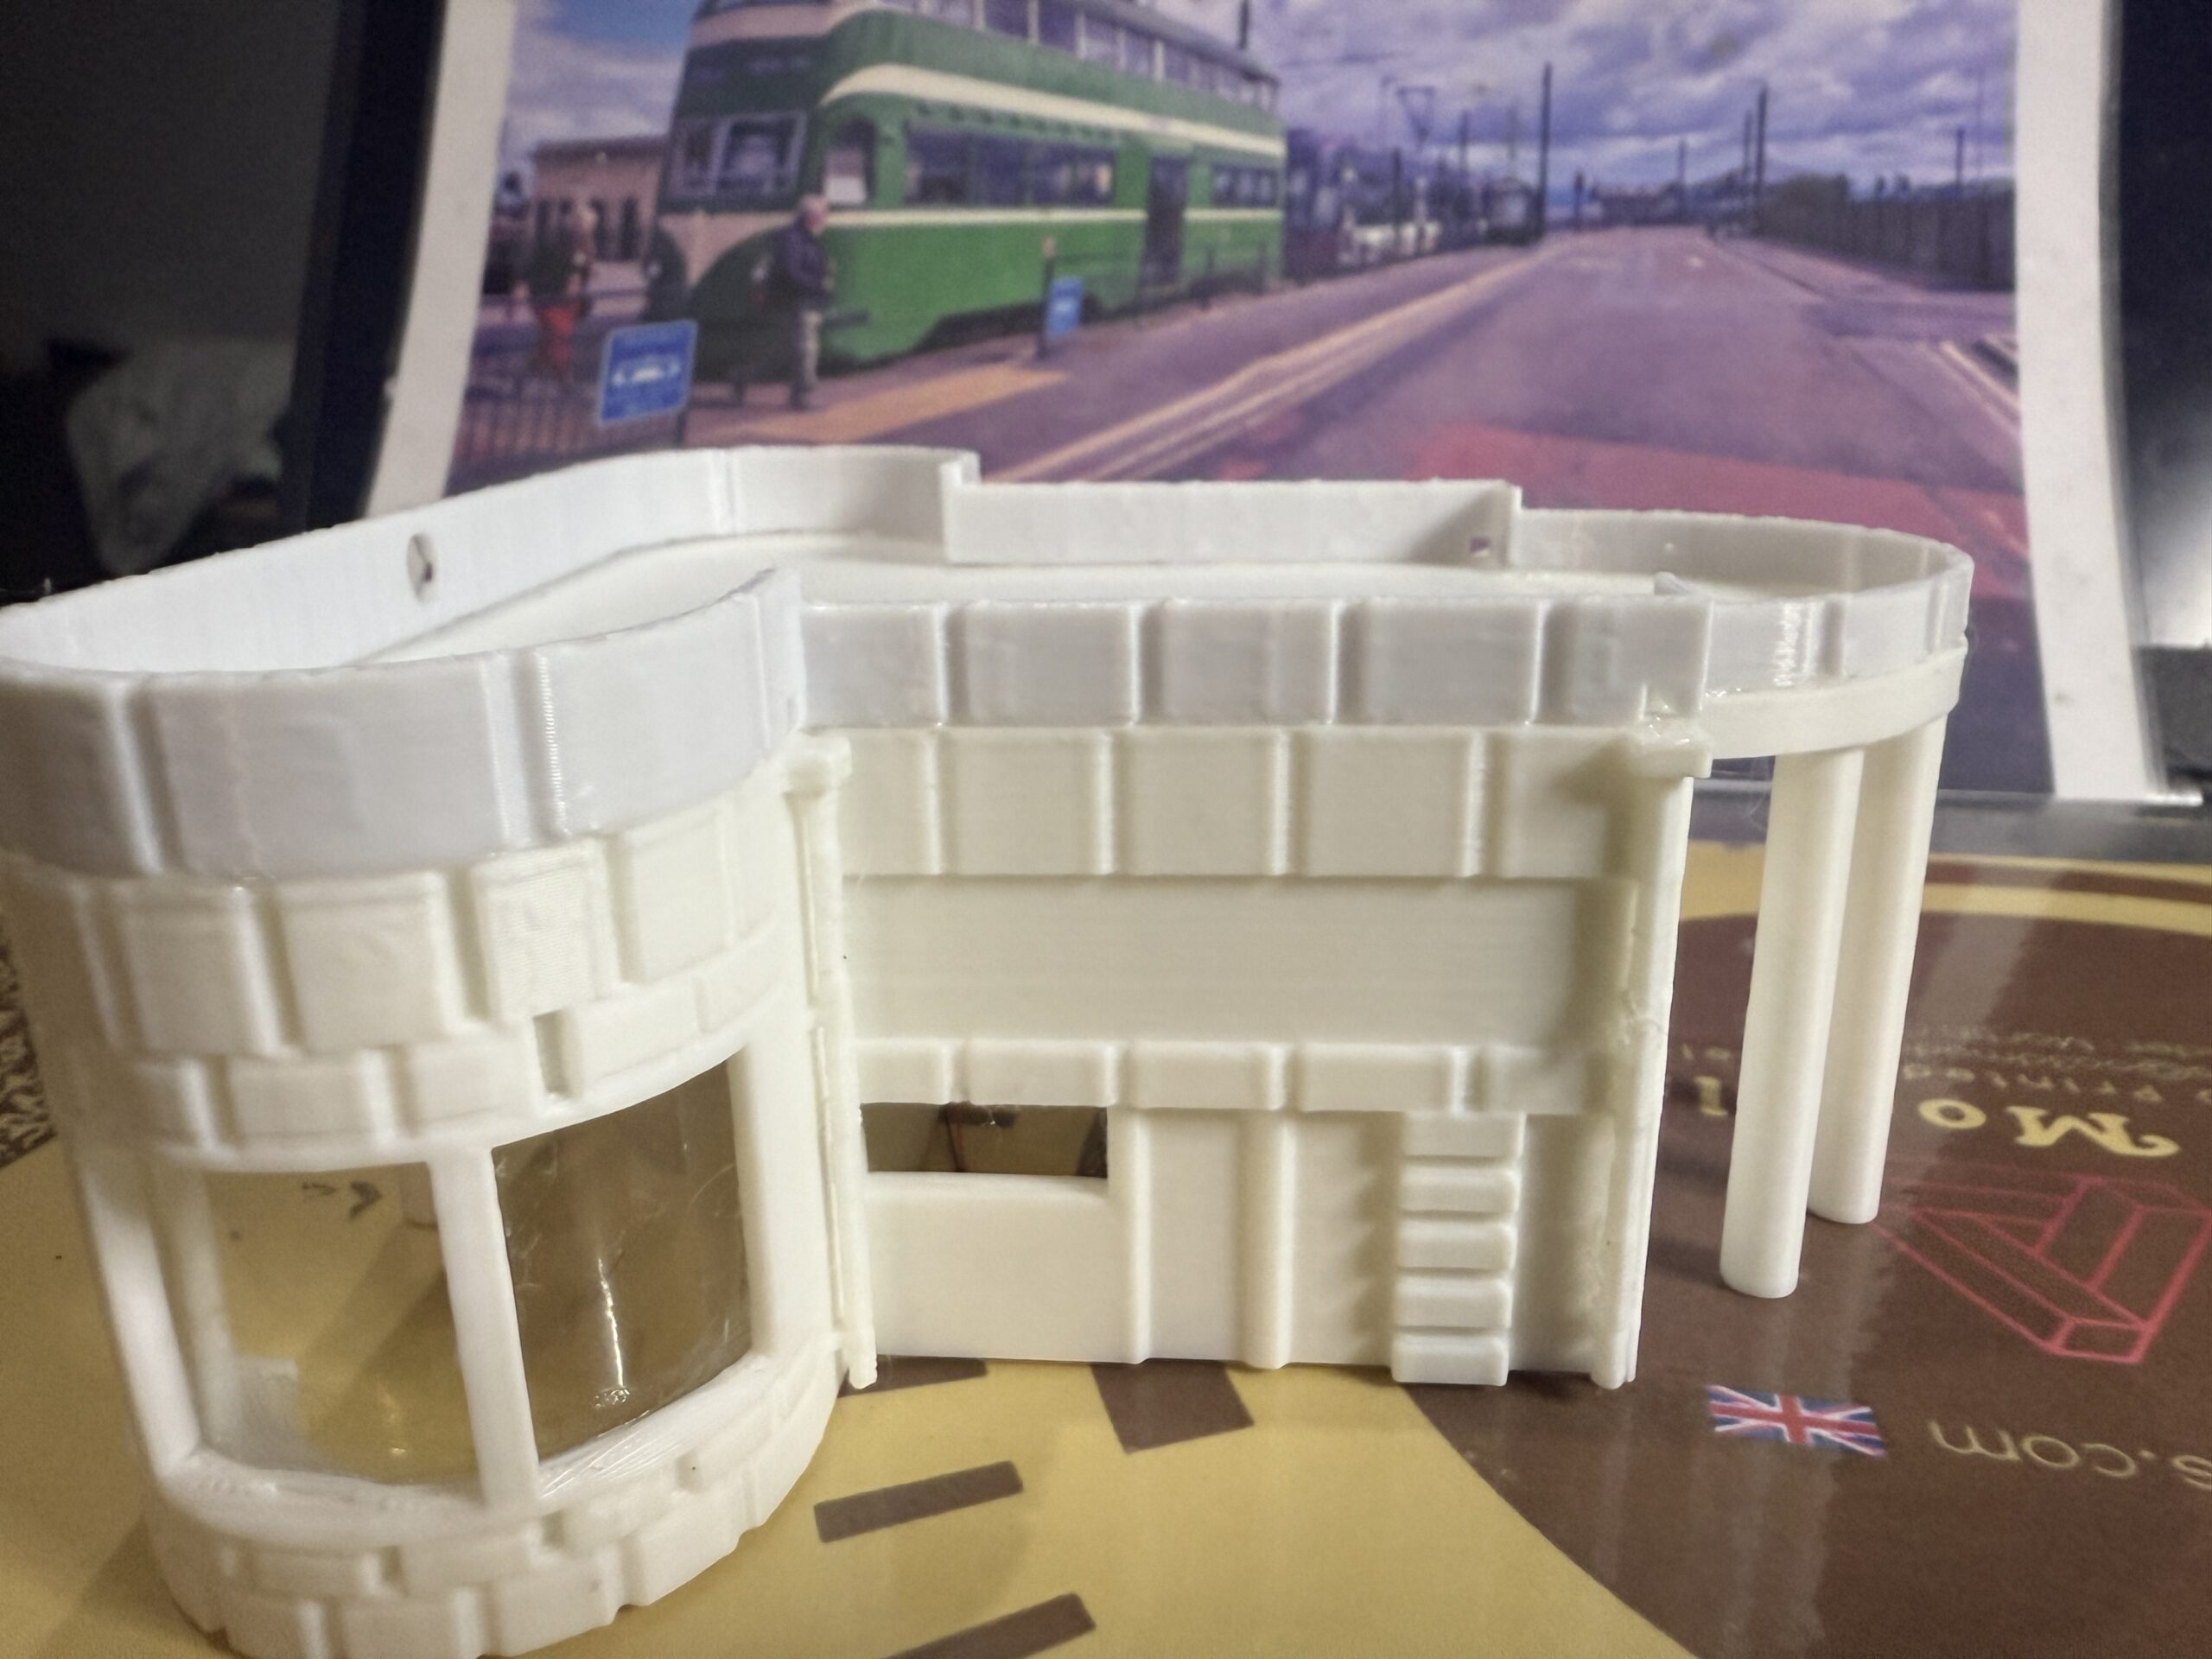
– **Simplified Assembly:** Only four main parts for easy construction.
– **Personalization Ready:** Paint the model in your colours to suit your setup.
**What’s Included:**
– Main building
– Interior seating
– Roof skirt for trench-style roof
– Pre-wired 3V DC LED with shade
– Clear plastic sheets for windows (protective film included)
– “Little Bispham” name sticker
**About Little Bispham Tram Stop**
Little Bispham Tram Stop is a charming and historically significant part of Blackpool’s famous tramway. Nestled in the northern part of the town, it serves as a peaceful spot for passengers to embark on their seaside adventures. Its distinctive architectural features make it a favourite among tram enthusiasts and modelers alike. With this model, we aim to capture the essence of this beloved landmark.
**Assembly Instructions:**
1. **Preparation:** Remove any leftover strands from the 3D printing process.
2. **Painting:** Paint the model in your preferred colours before assembling.
3. **Roof Skirt:** Attach the roof skirt carefully, using a slow-curing glue to ensure proper alignment and adjustment time.
4. **Windows:** Cut the plastic sheet for the windows, approximately 5cm for each bay window. Ensure the protective film is not glued. Use contact glue to secure the plastic, and once cured, gently remove the film from the inside.
5. **LED Installation:** Attach the LED to the shade, ensuring the light end faces into the shade. Run the wires through the small hole near the roof and glue the lampshade to the inside roof.
6. **Interior Details:** Attach the seating and apply the name sticker.
7. **Wiring:** Connect the LED to a 3V DC power source. If using higher voltage, add the correct resistor to avoid damaging the LED. (Note: All LEDs are tested before shipping.)
**Important Notes:**
– Button cell holders are no longer supplied; please source them separately.
– Always follow proper resistor guidelines for voltages exceeding 3V.
**Copyright Notice**
© December 2024 oo3DModels. All rights reserved. Unauthorized reproduction or distribution of this product or its design is strictly prohibited.
Order your Blackpool Little Bispham Tram Stop today and bring this historic tram stop to life in your model collection! Available from **Saturday, December 14, 2024**, exclusively on the oo3DModels shop.
![]()
Reviews
There are no reviews yet.