

Description
Enhance Your Model Scene with oo3dmodels Version 2 Pylons Kit
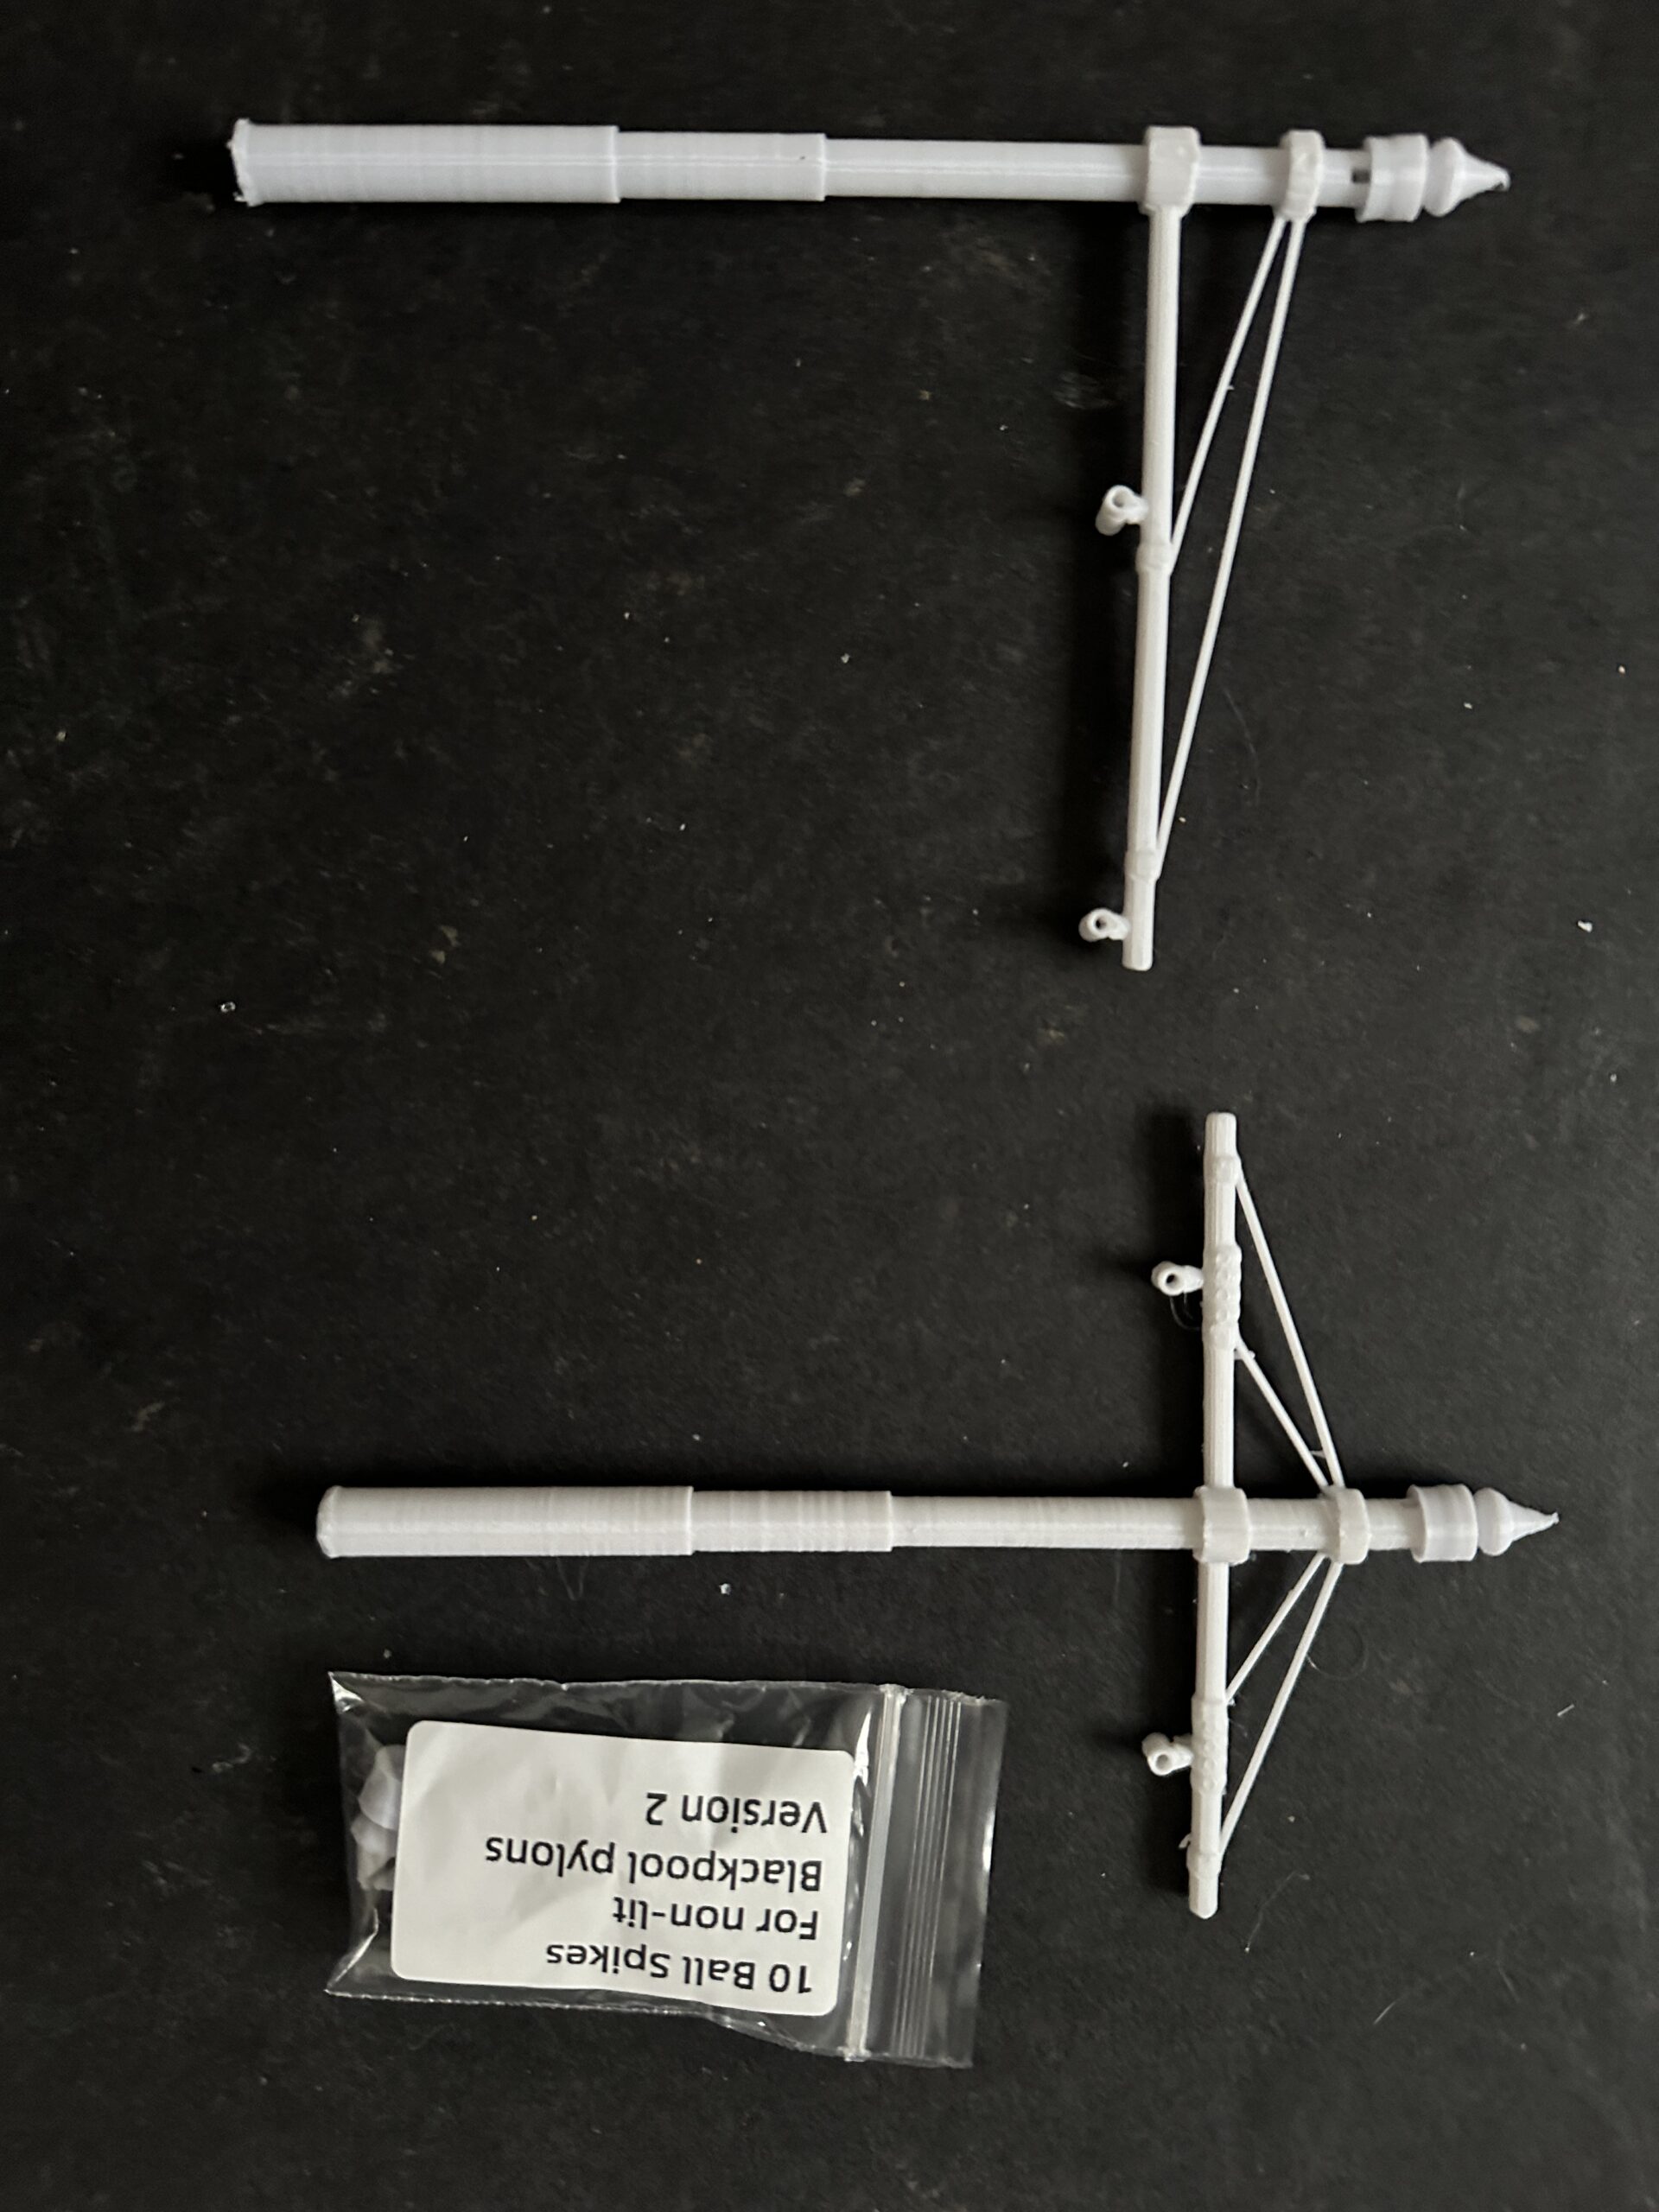
Experience unparalleled realism in your model scene with the oo3dmodels Version 2 Pylons Kit, meticulously crafted in 1/76 scale and 3D printed in white PLA. Whether you opt for the classic non-lit version or the illuminated version, our new version pylons offer adjustable arm height for effortless customization to suit your layout.
Key Features:
- Adjustable Height Arms: Tailor the pylons to fit seamlessly into your model scene with adjustable arm height, ensuring a perfect fit for your layout.
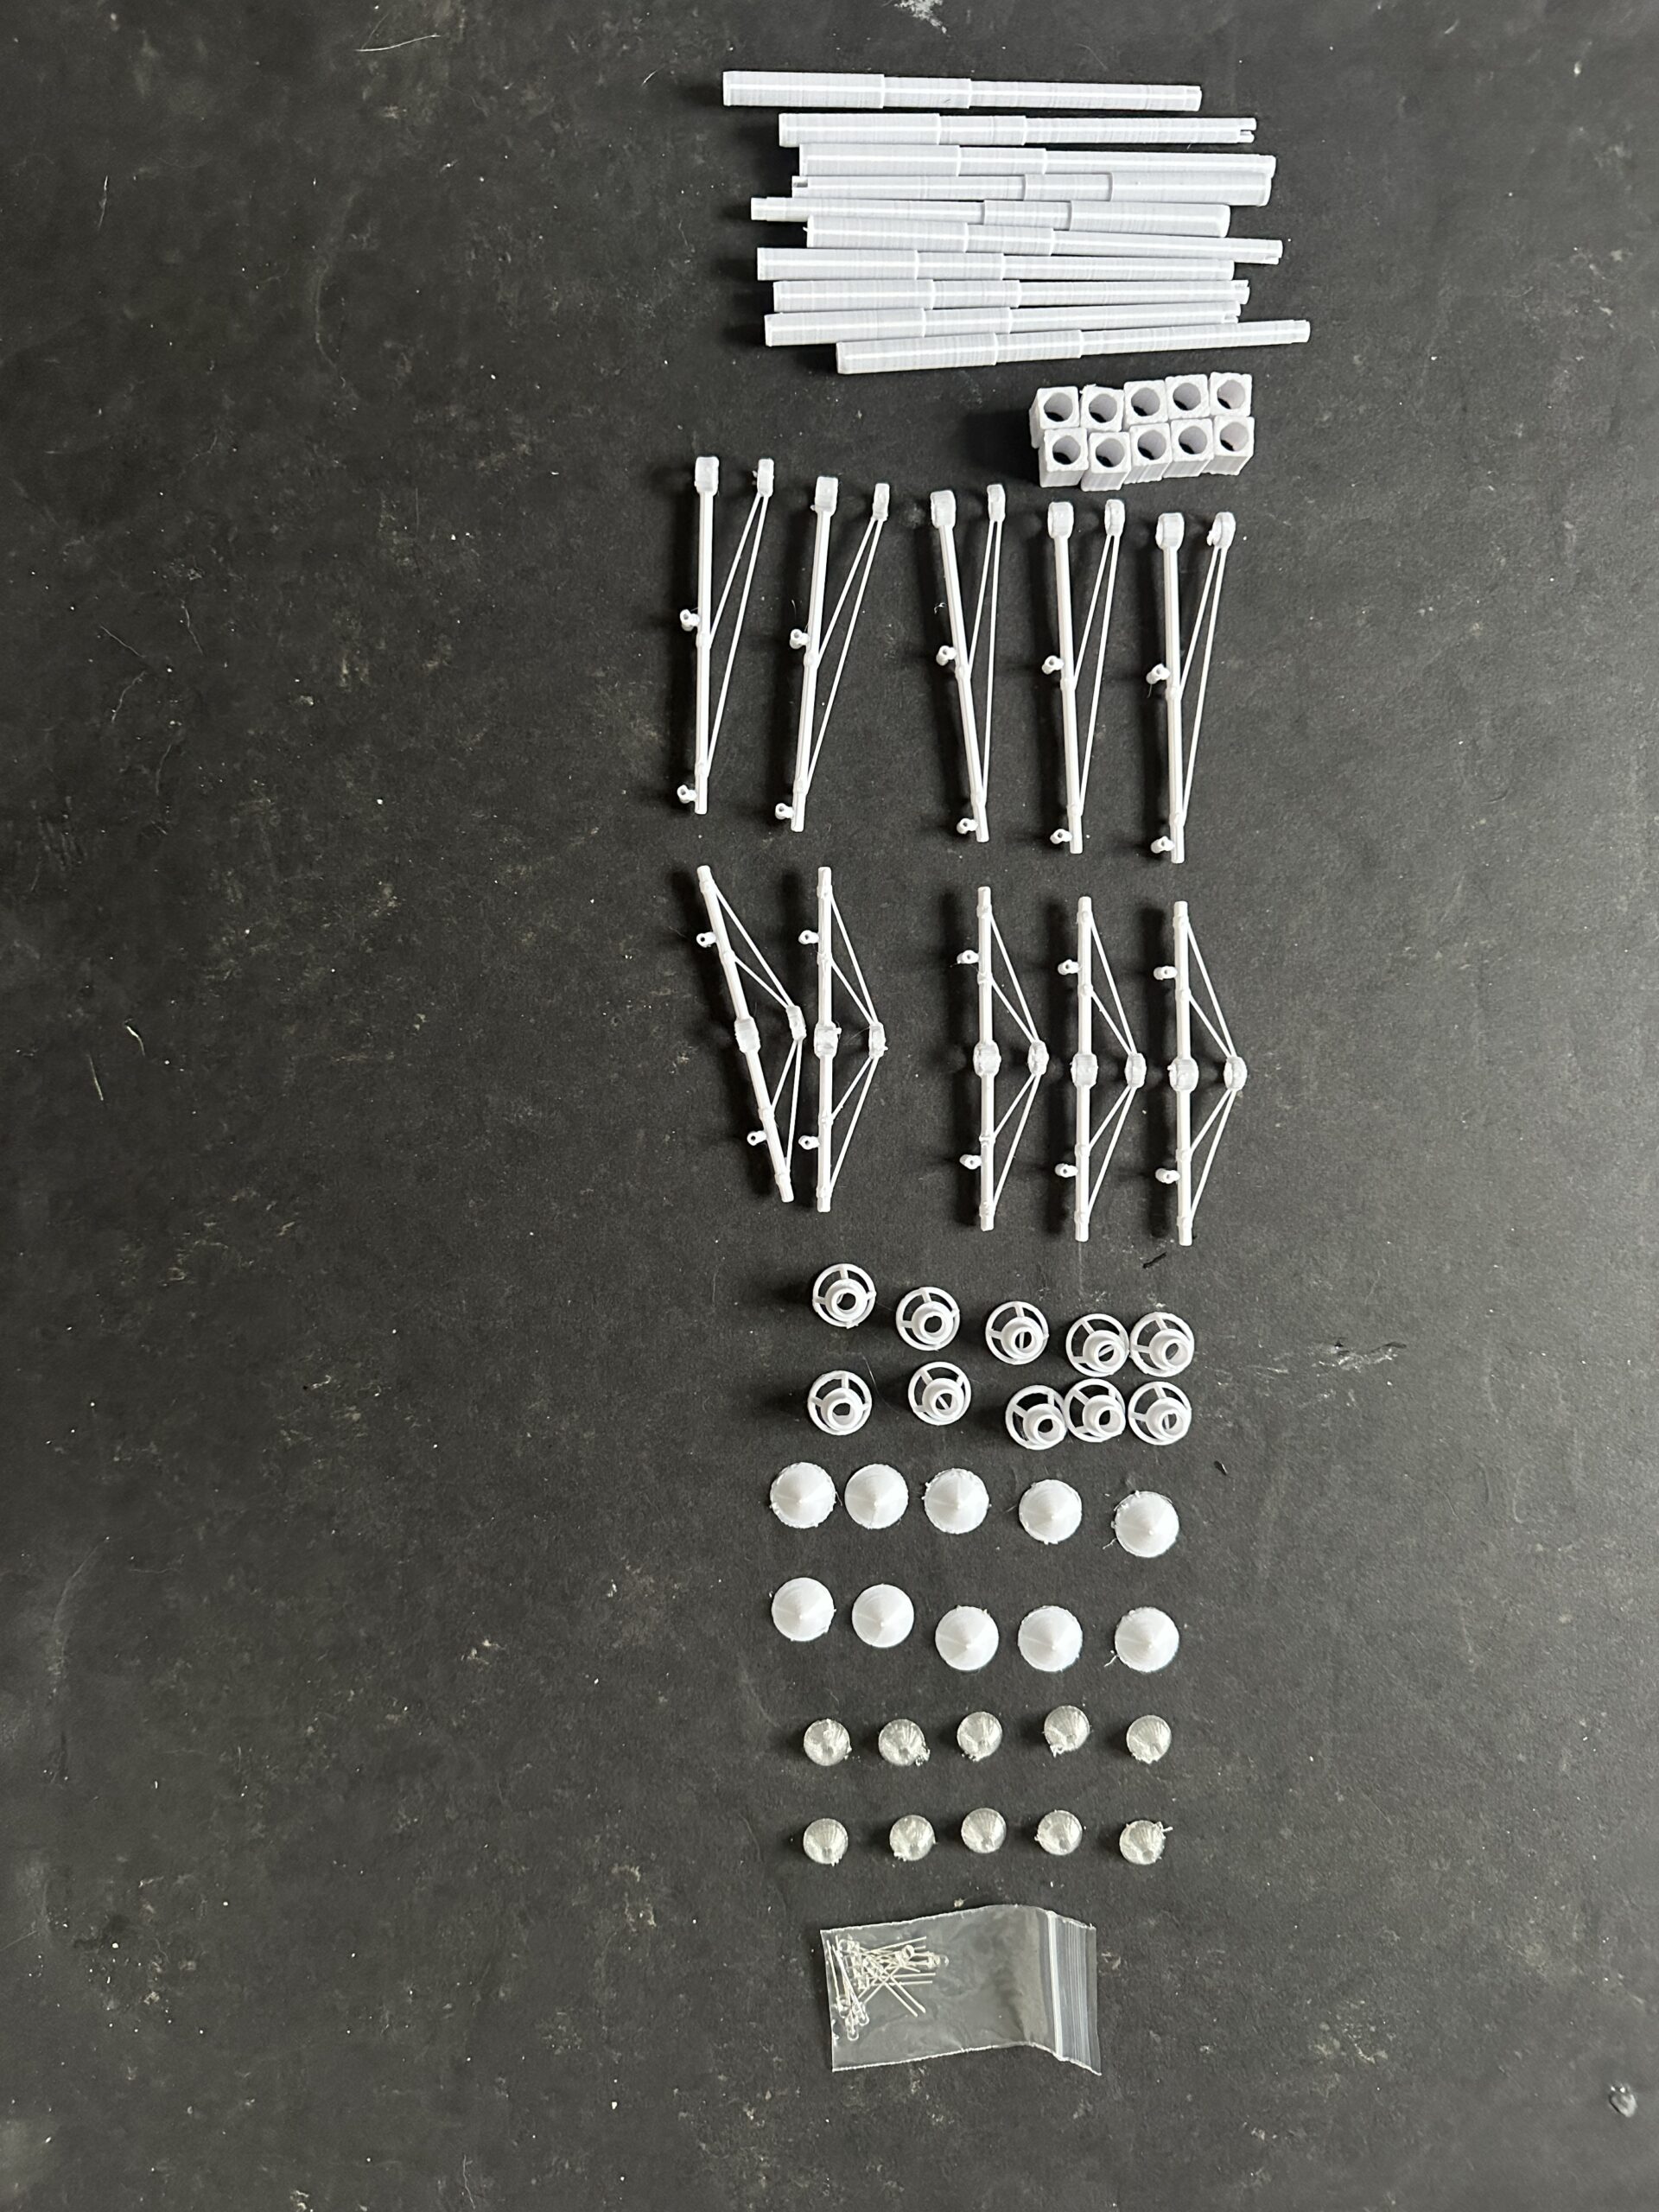
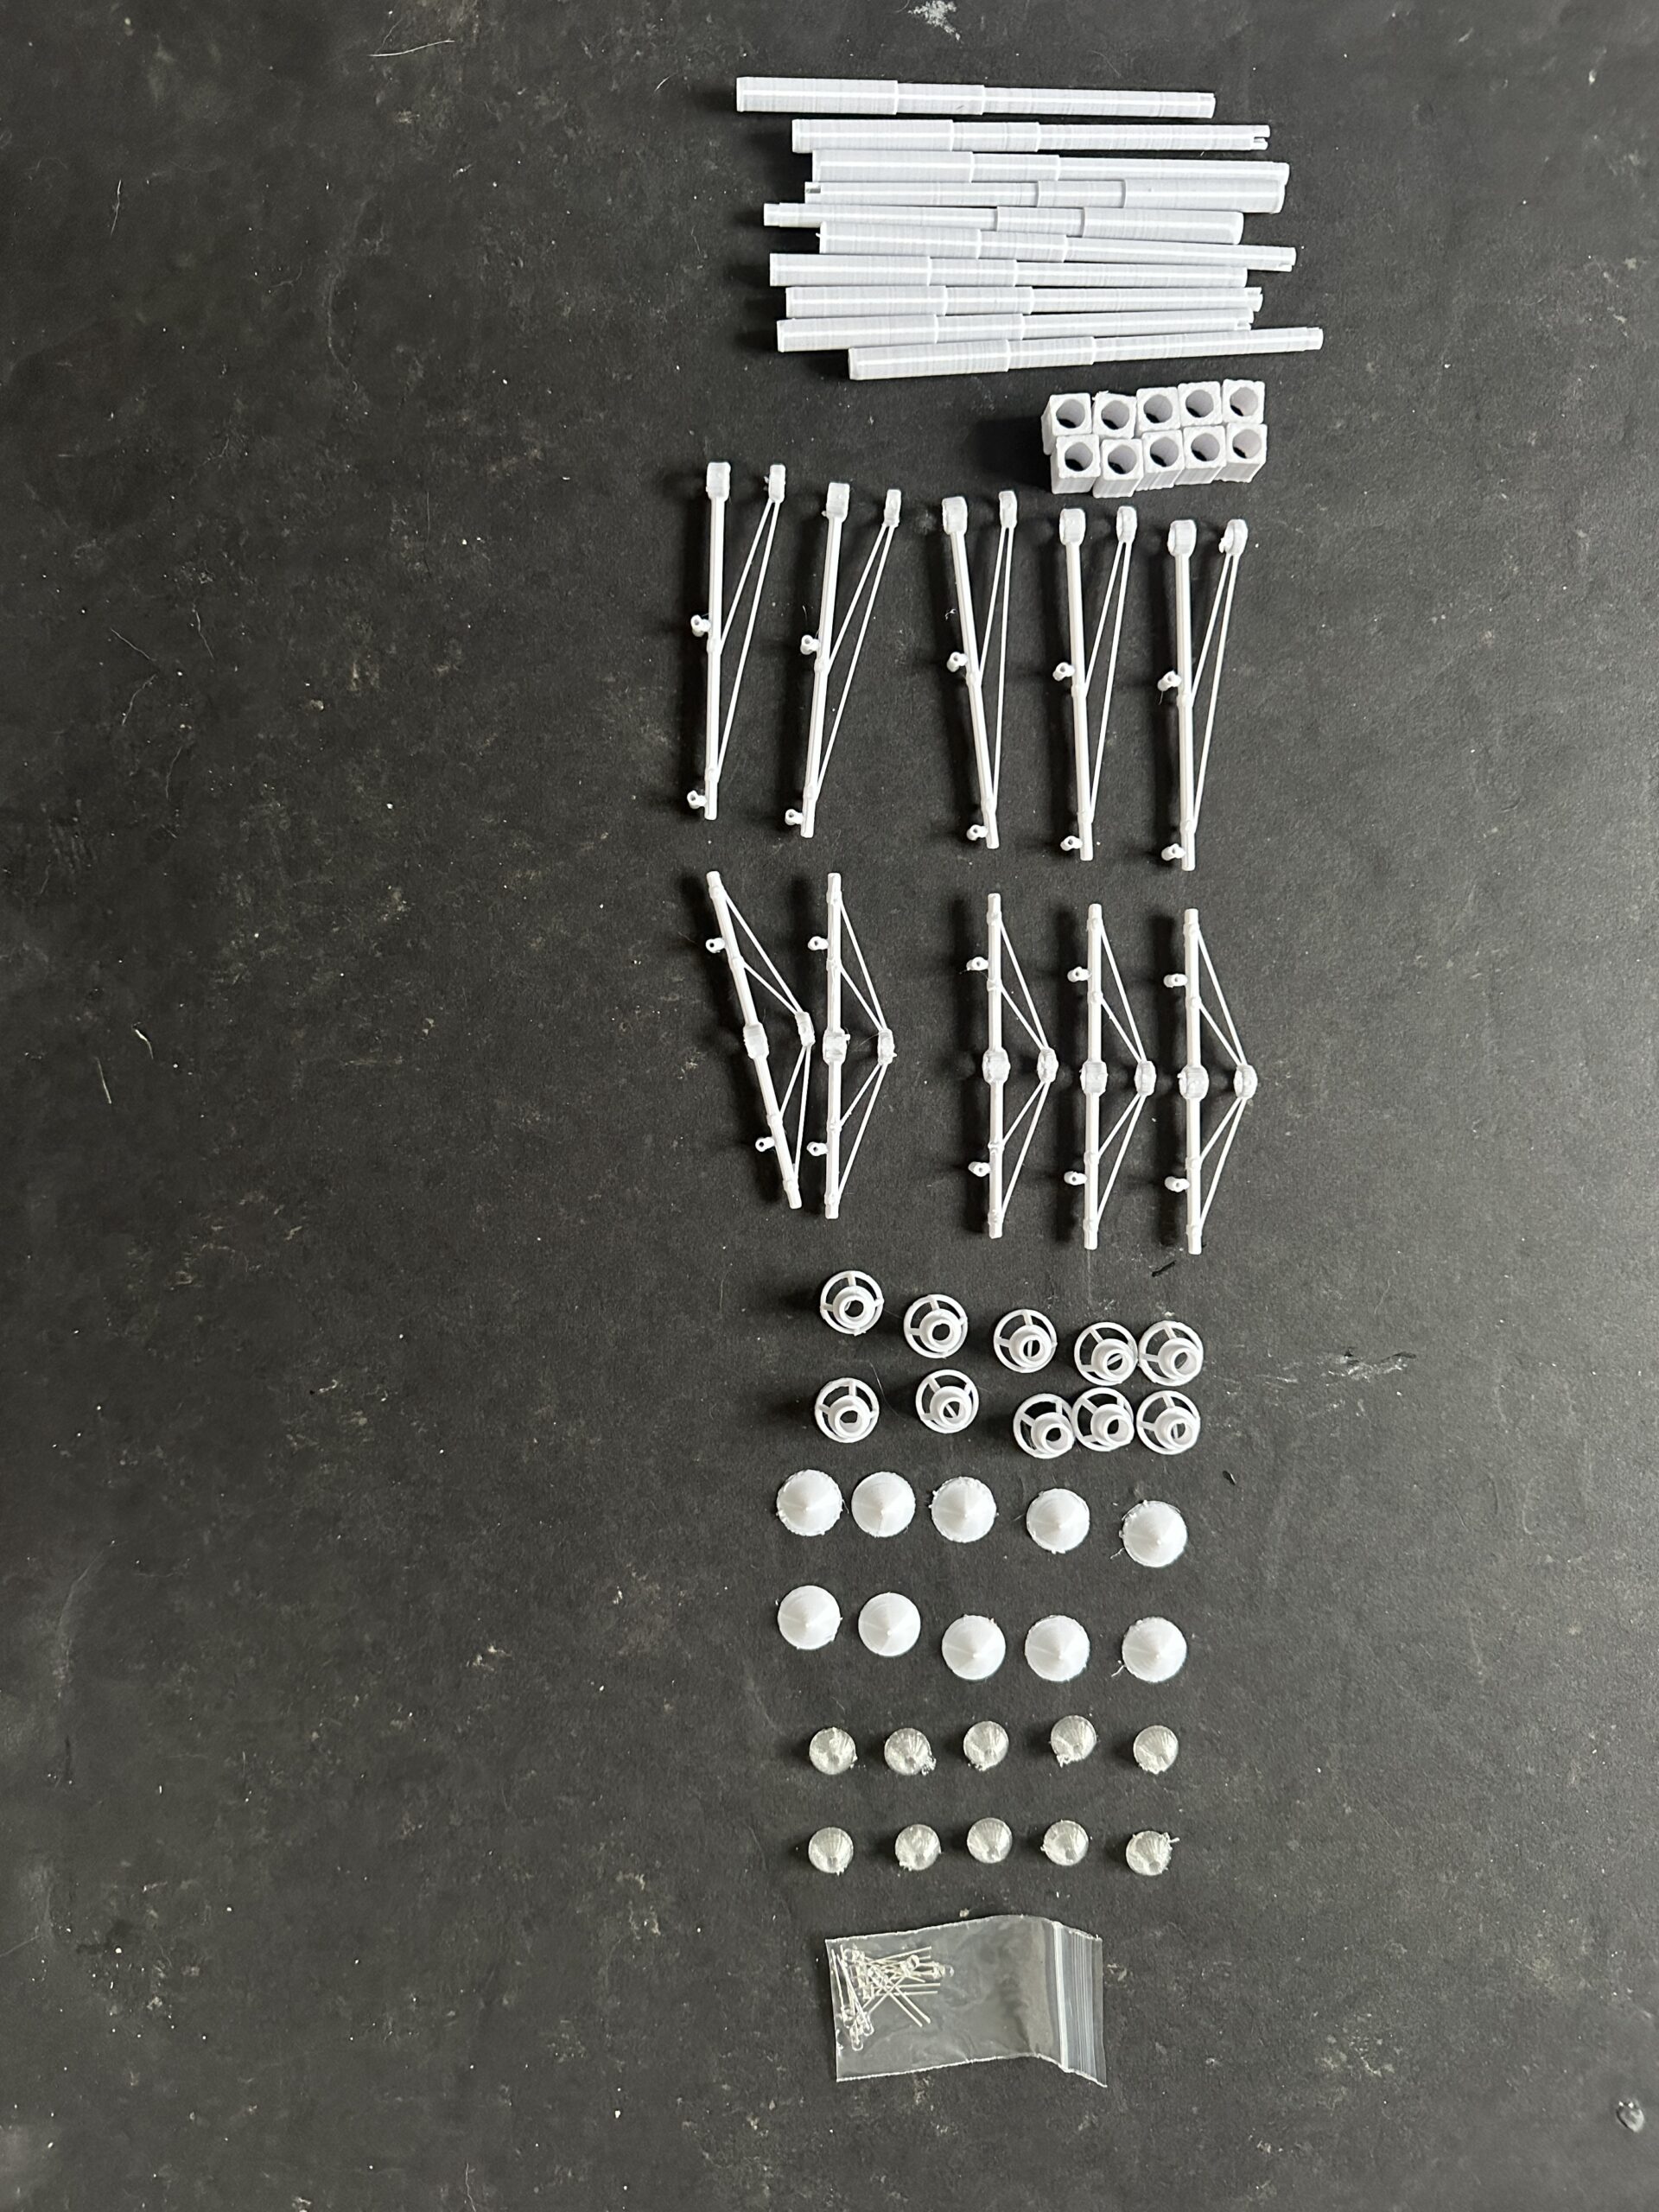
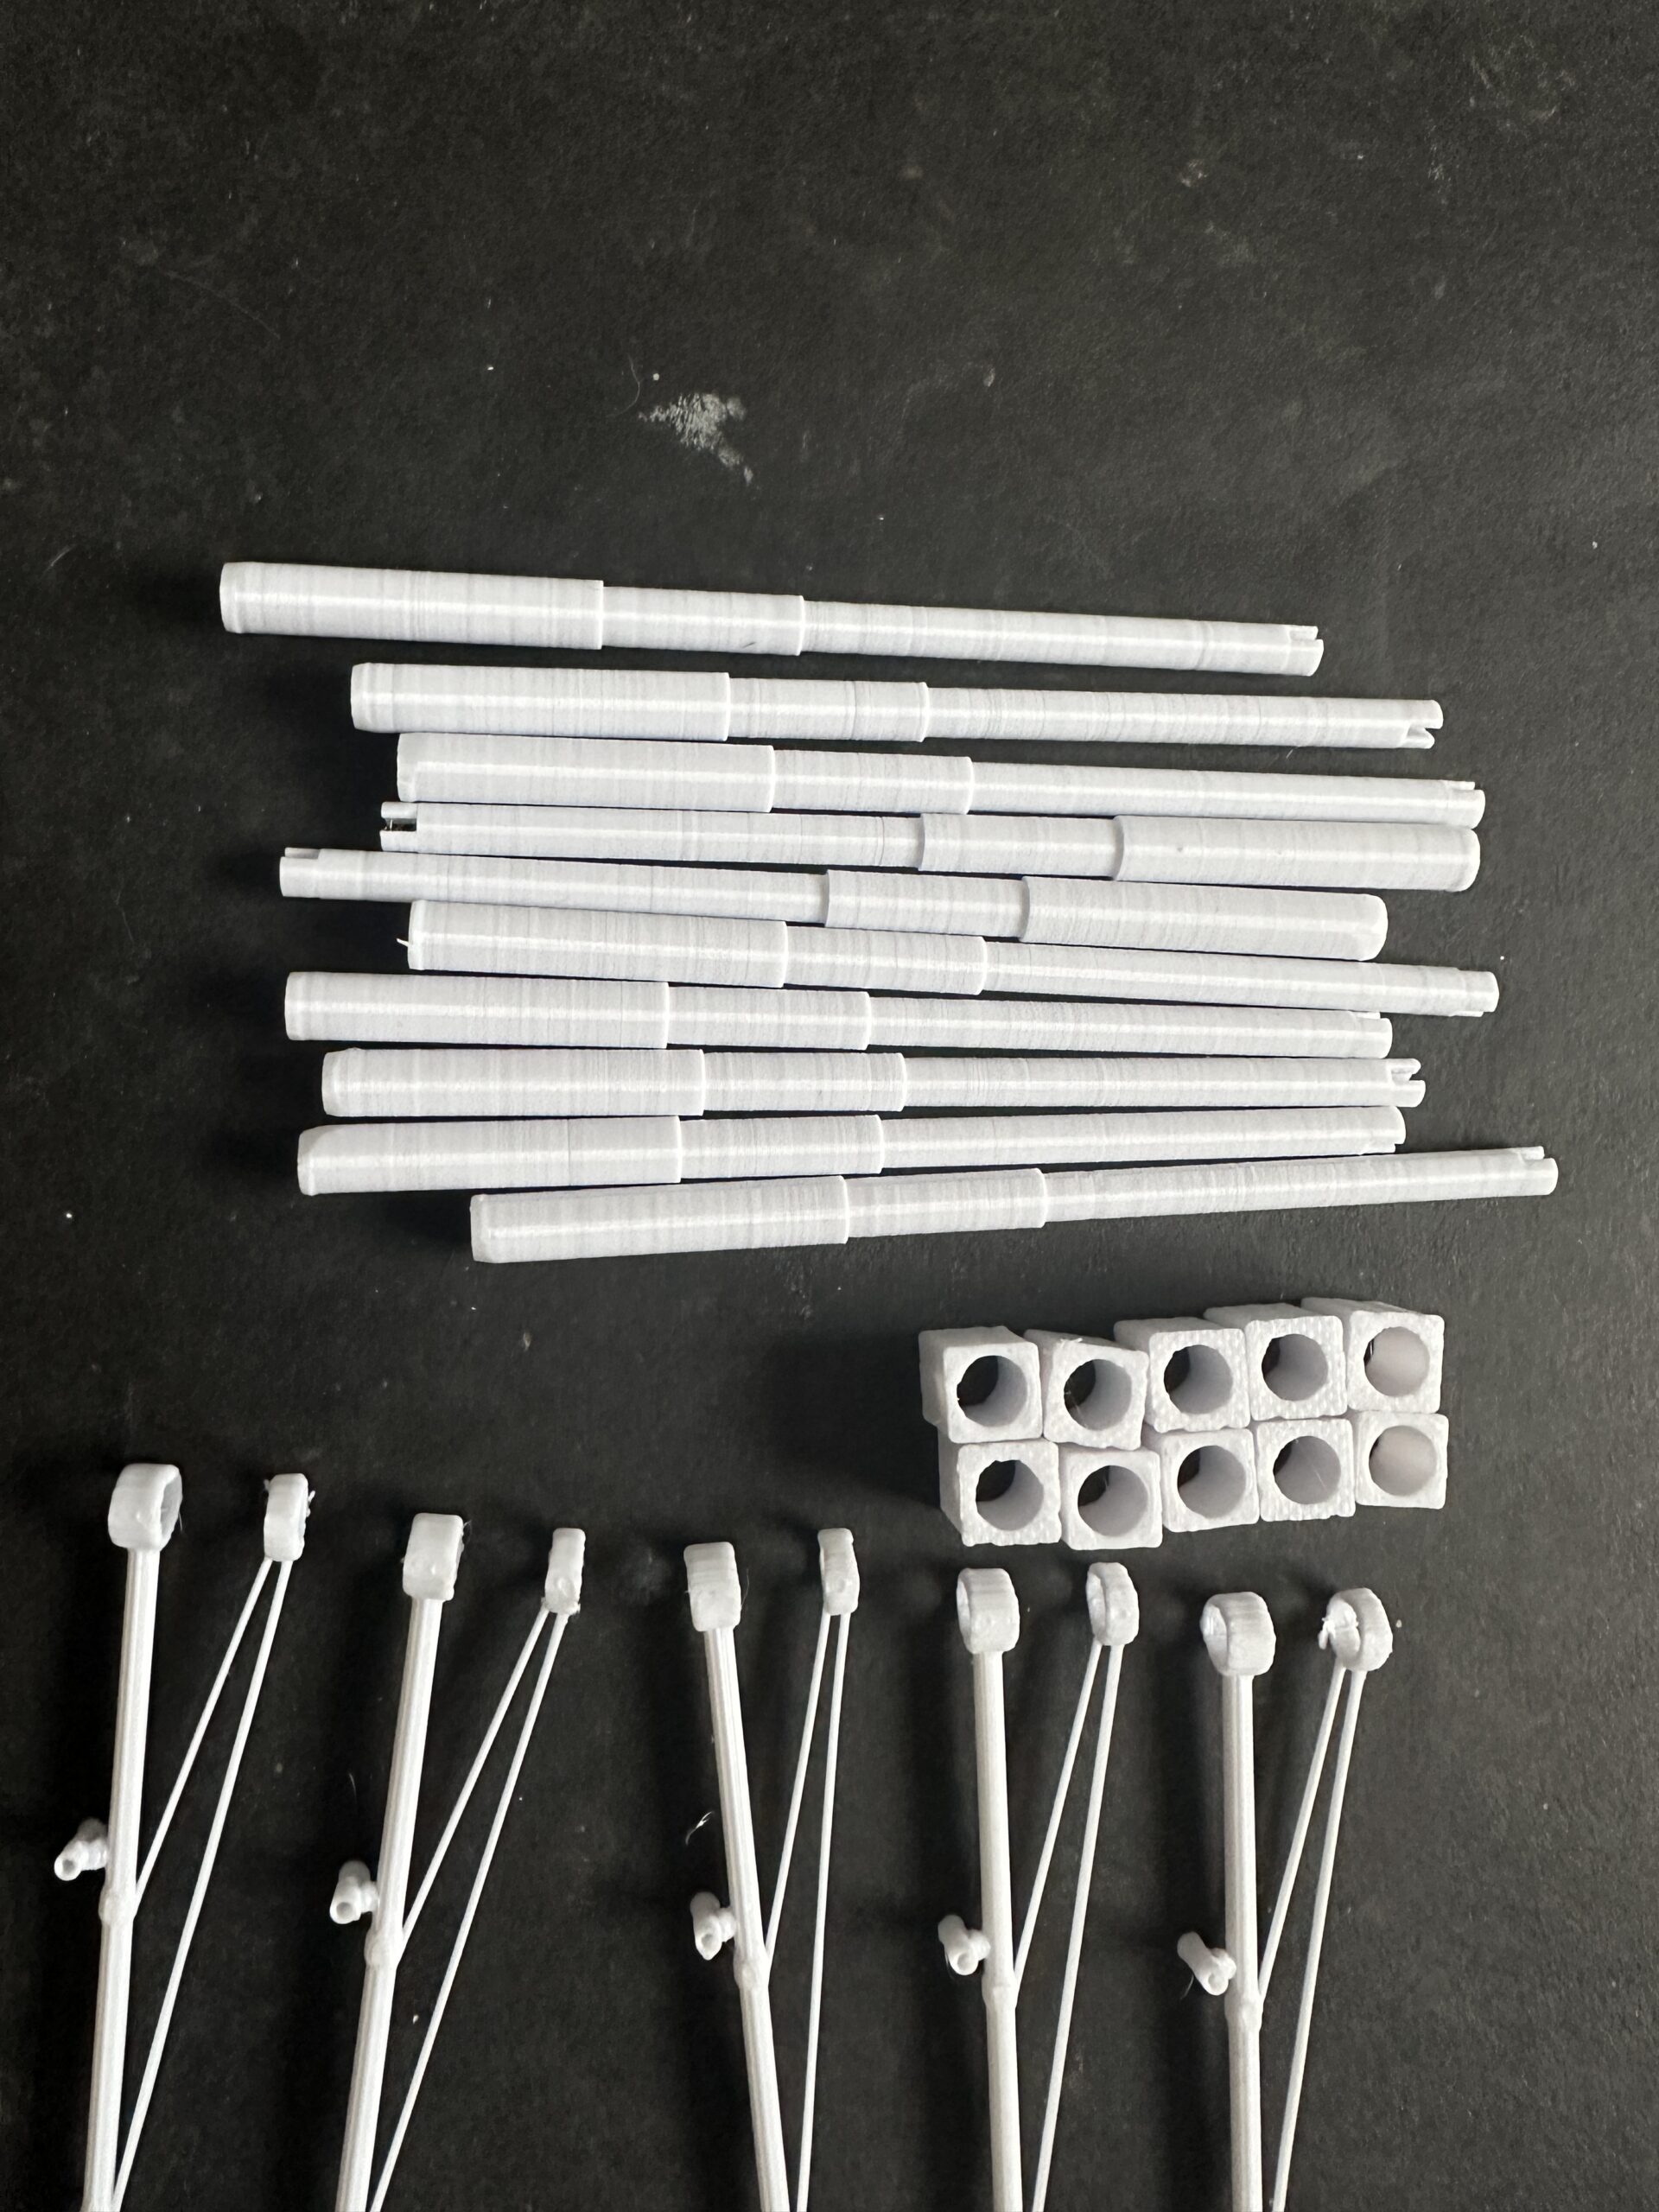
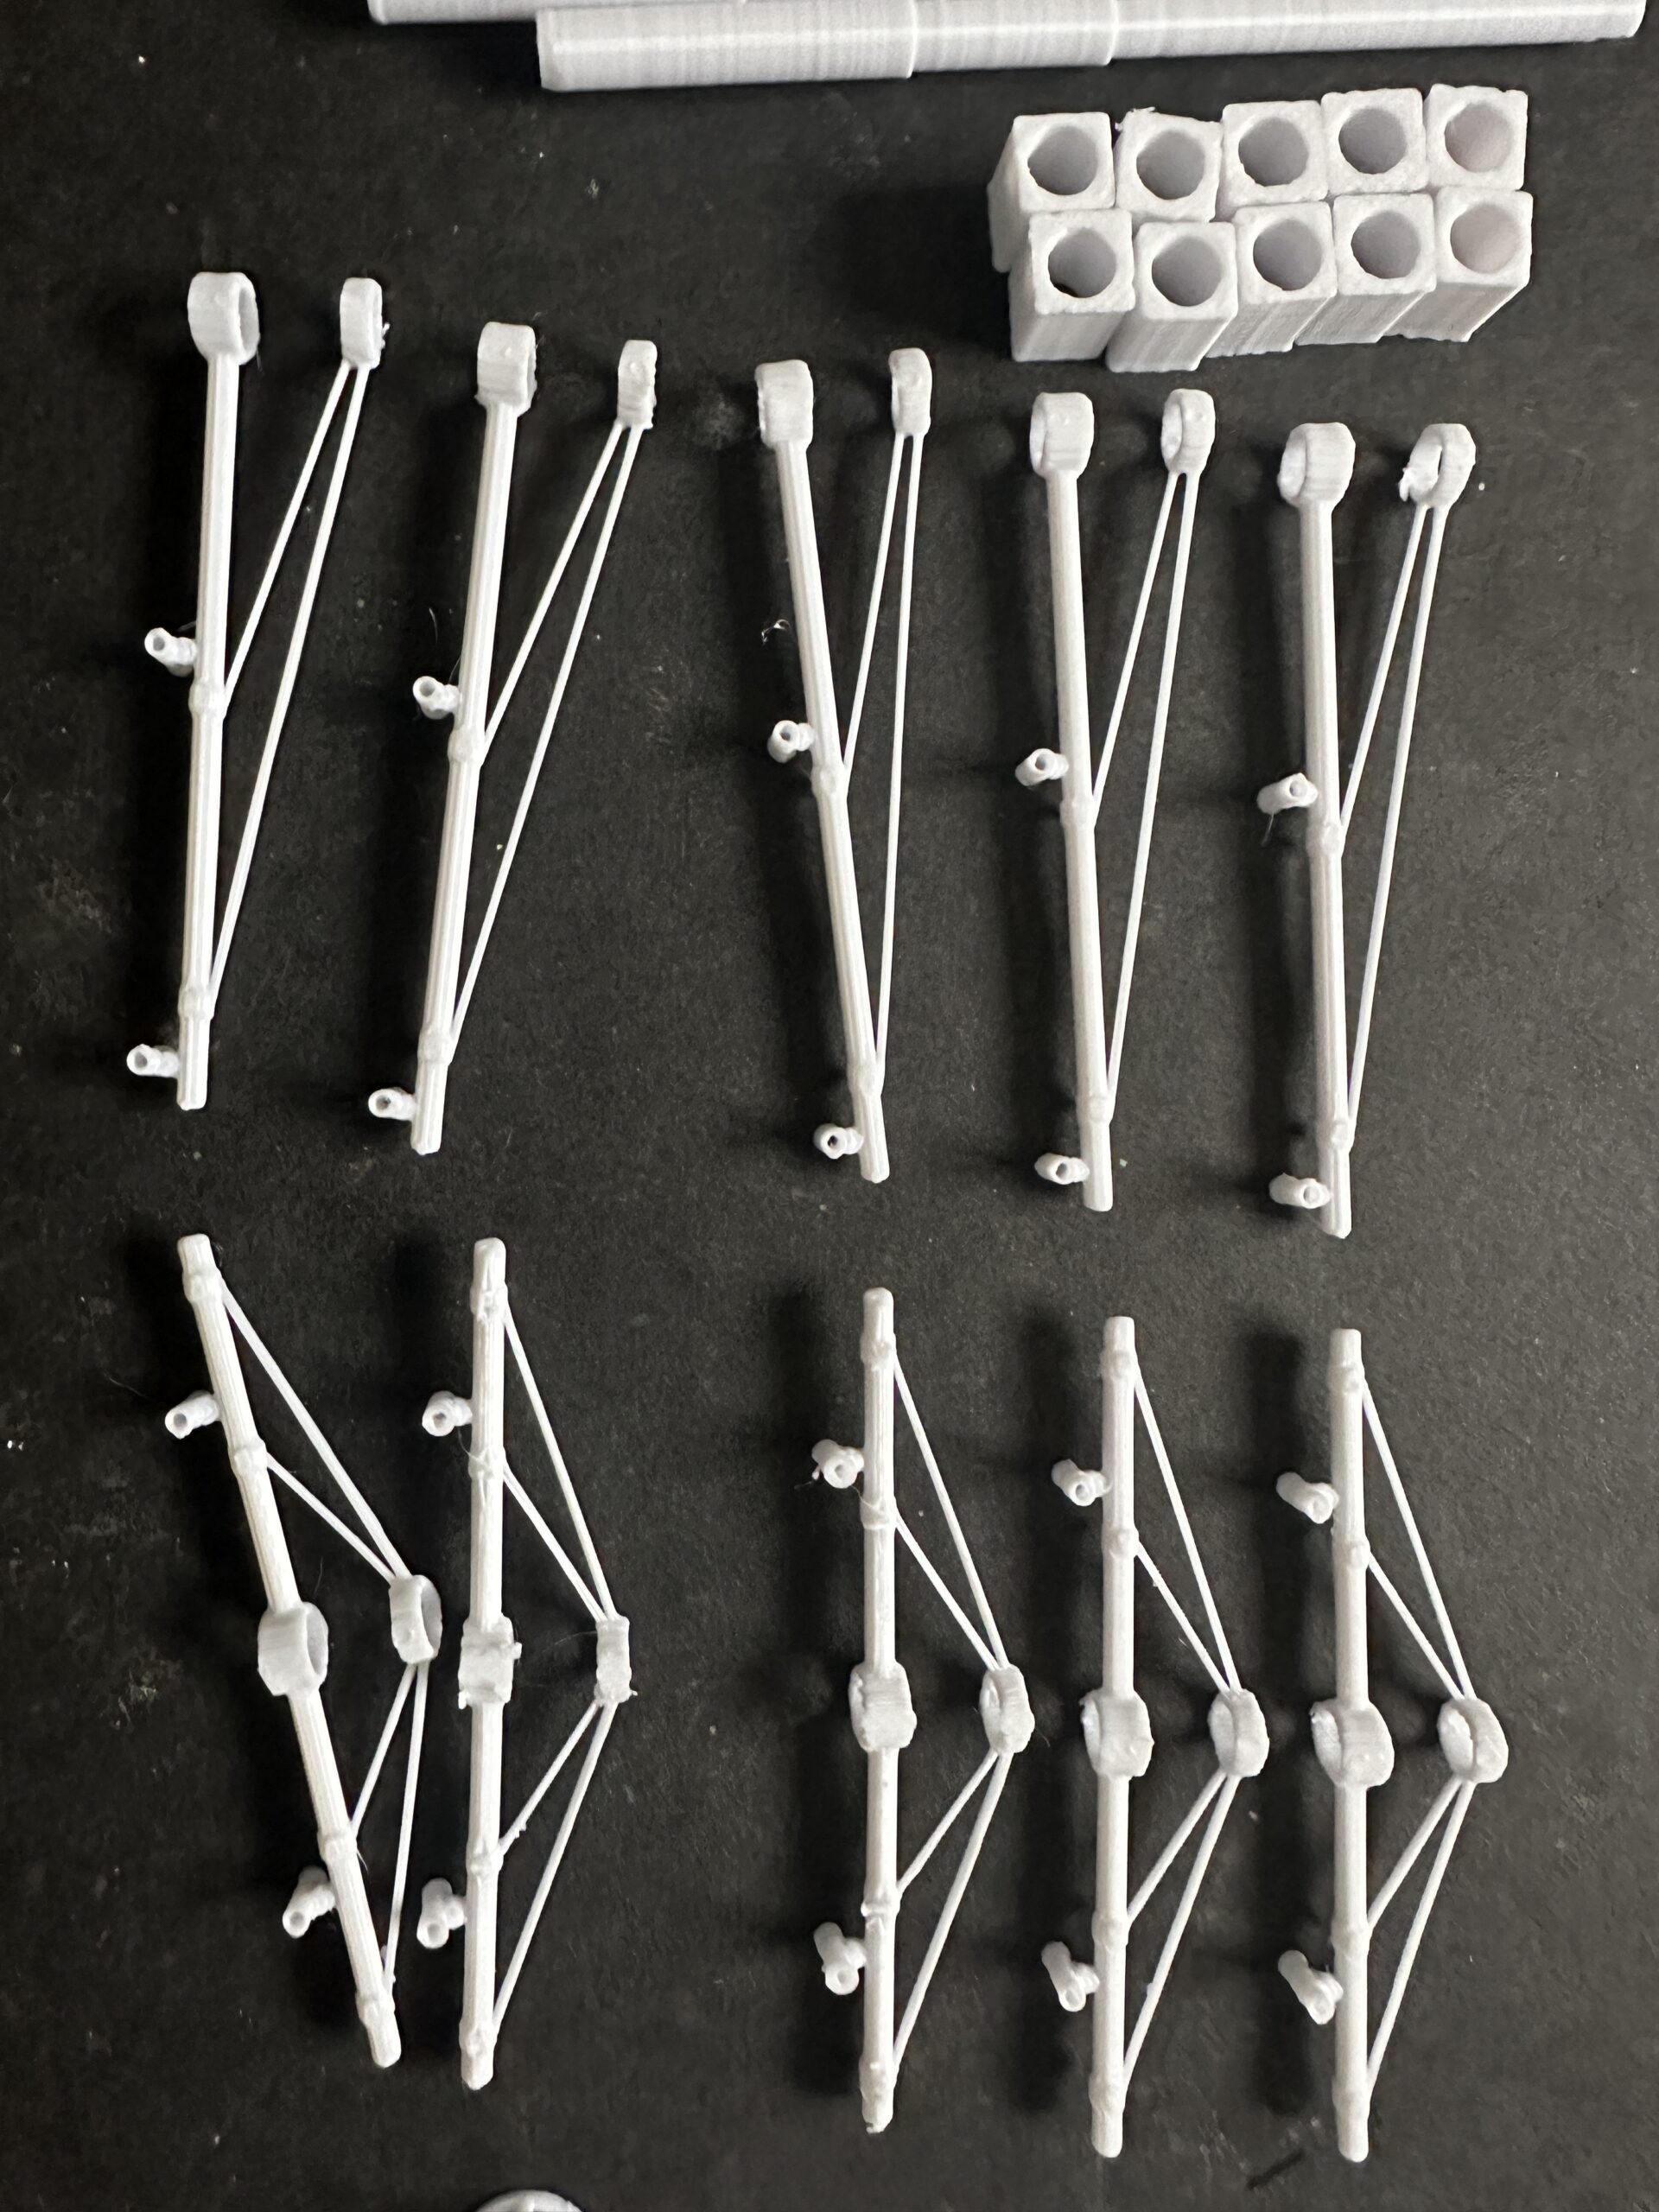
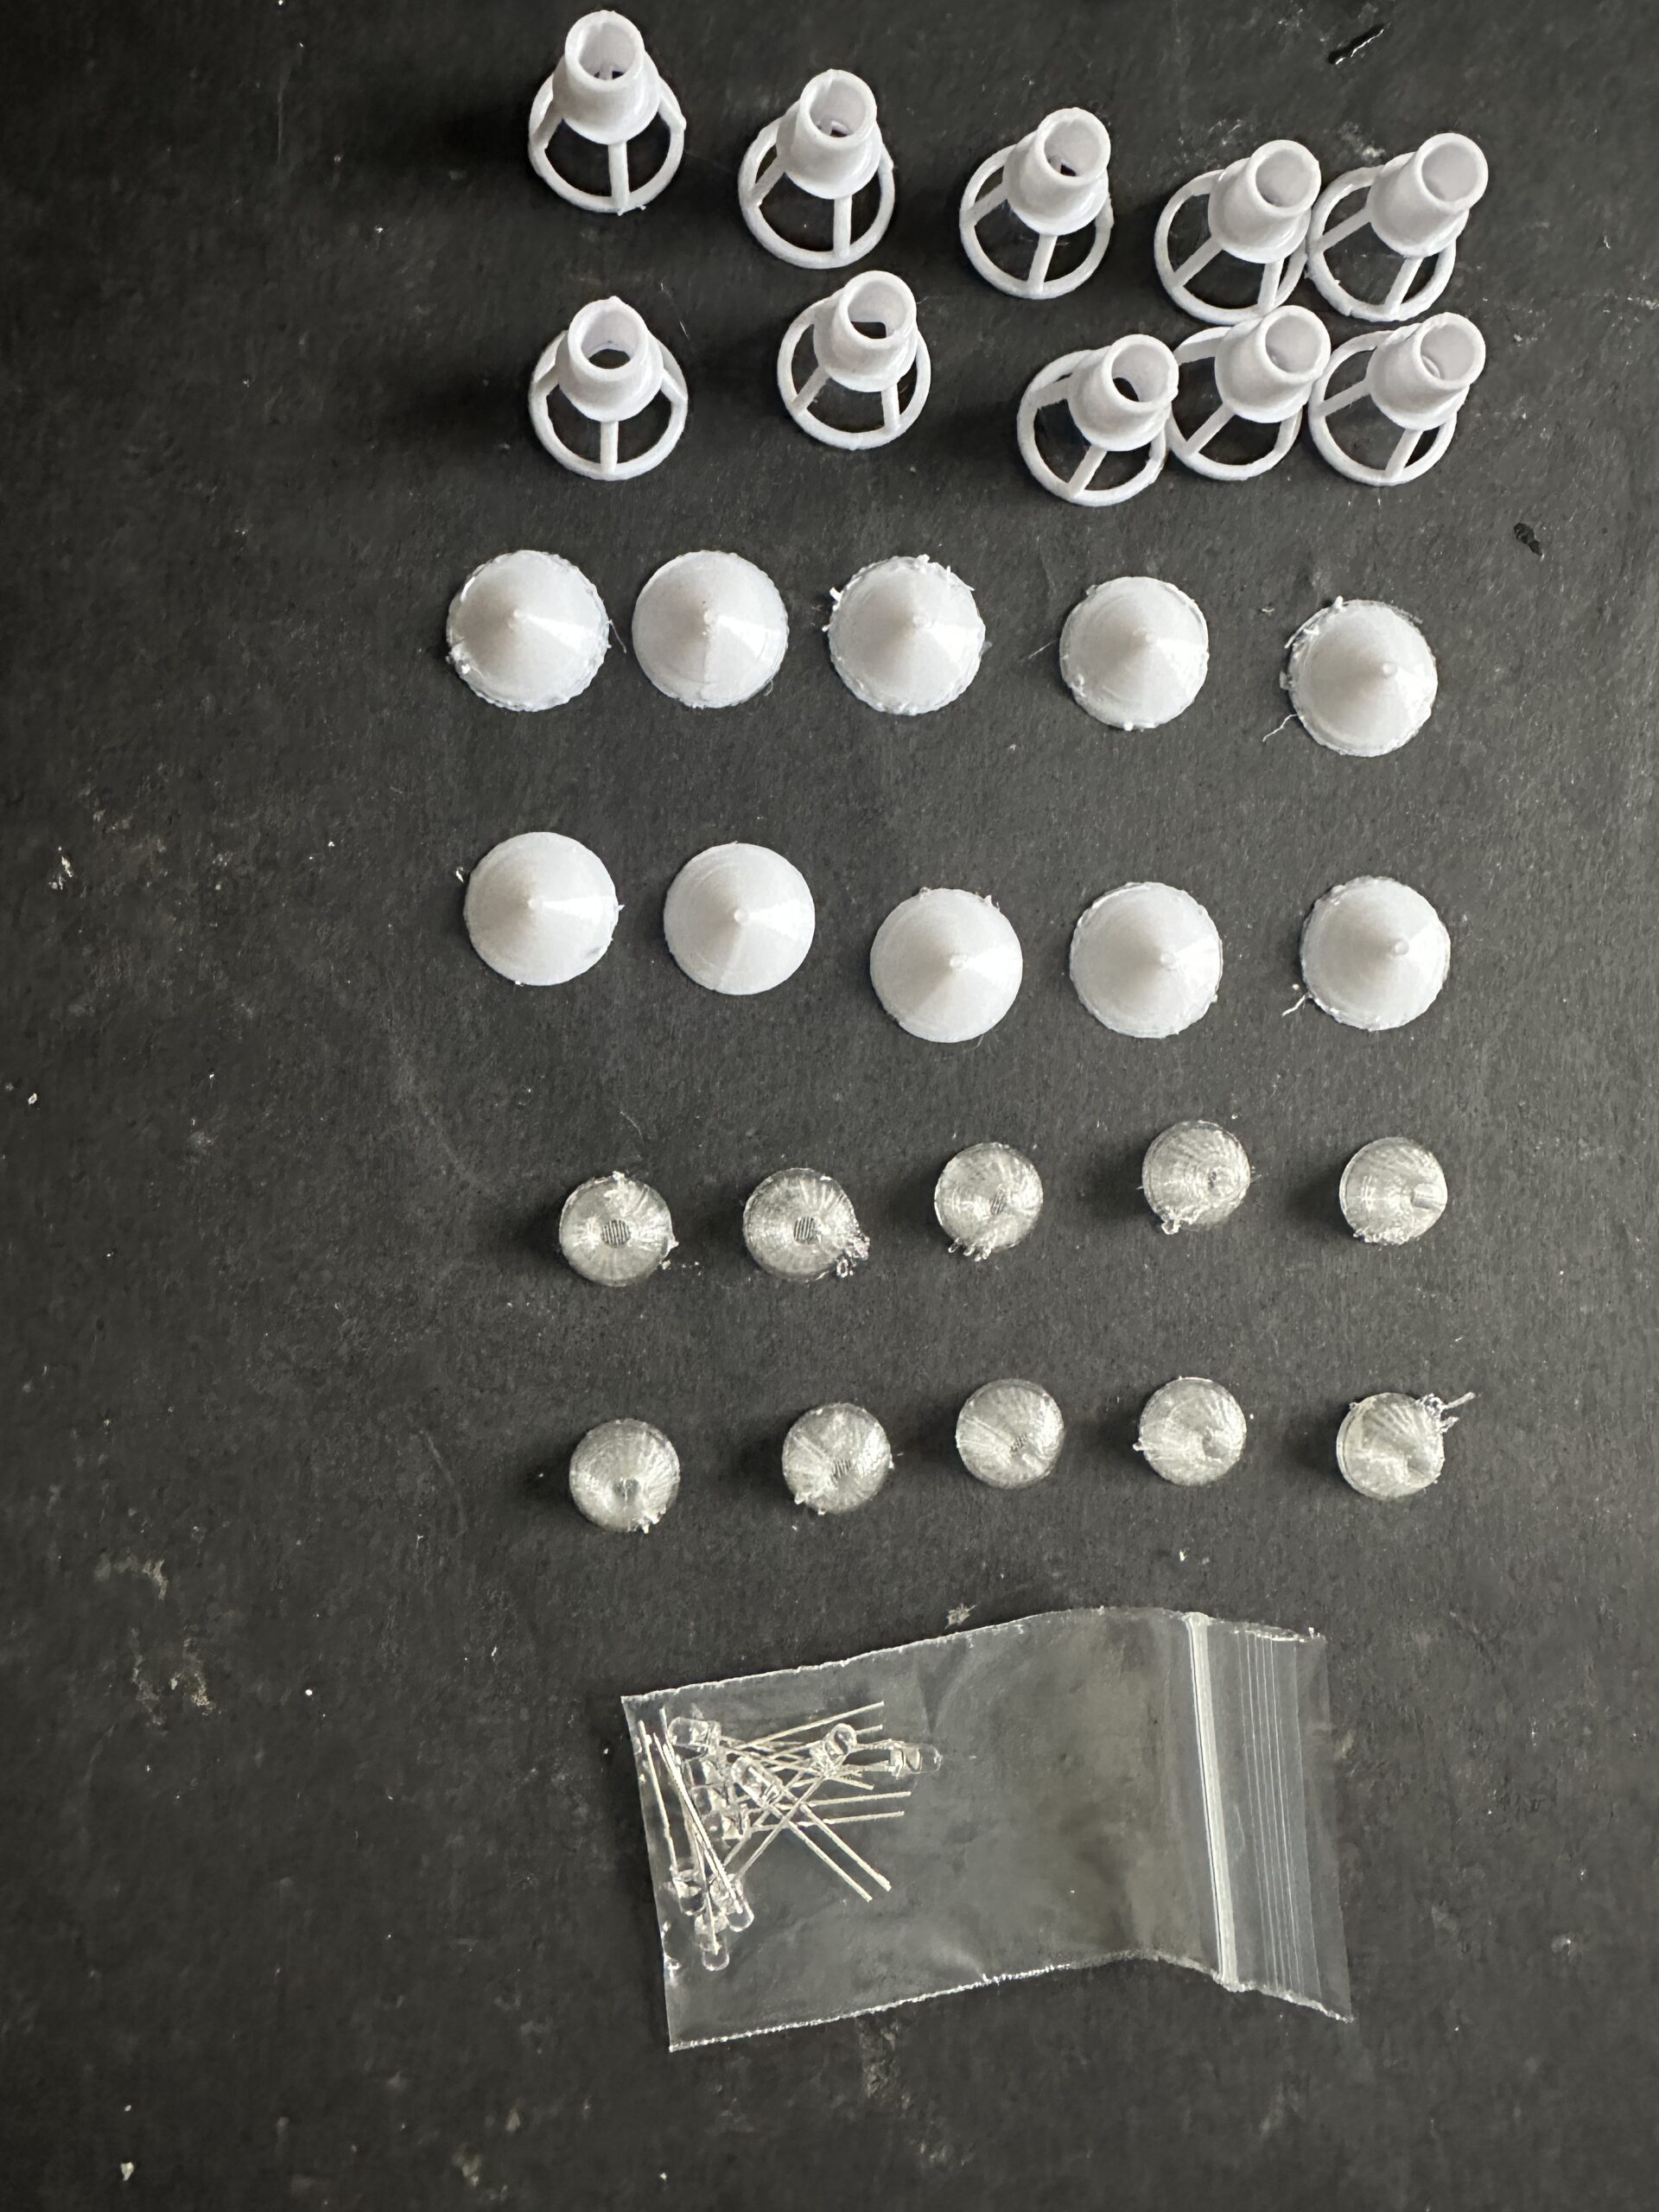
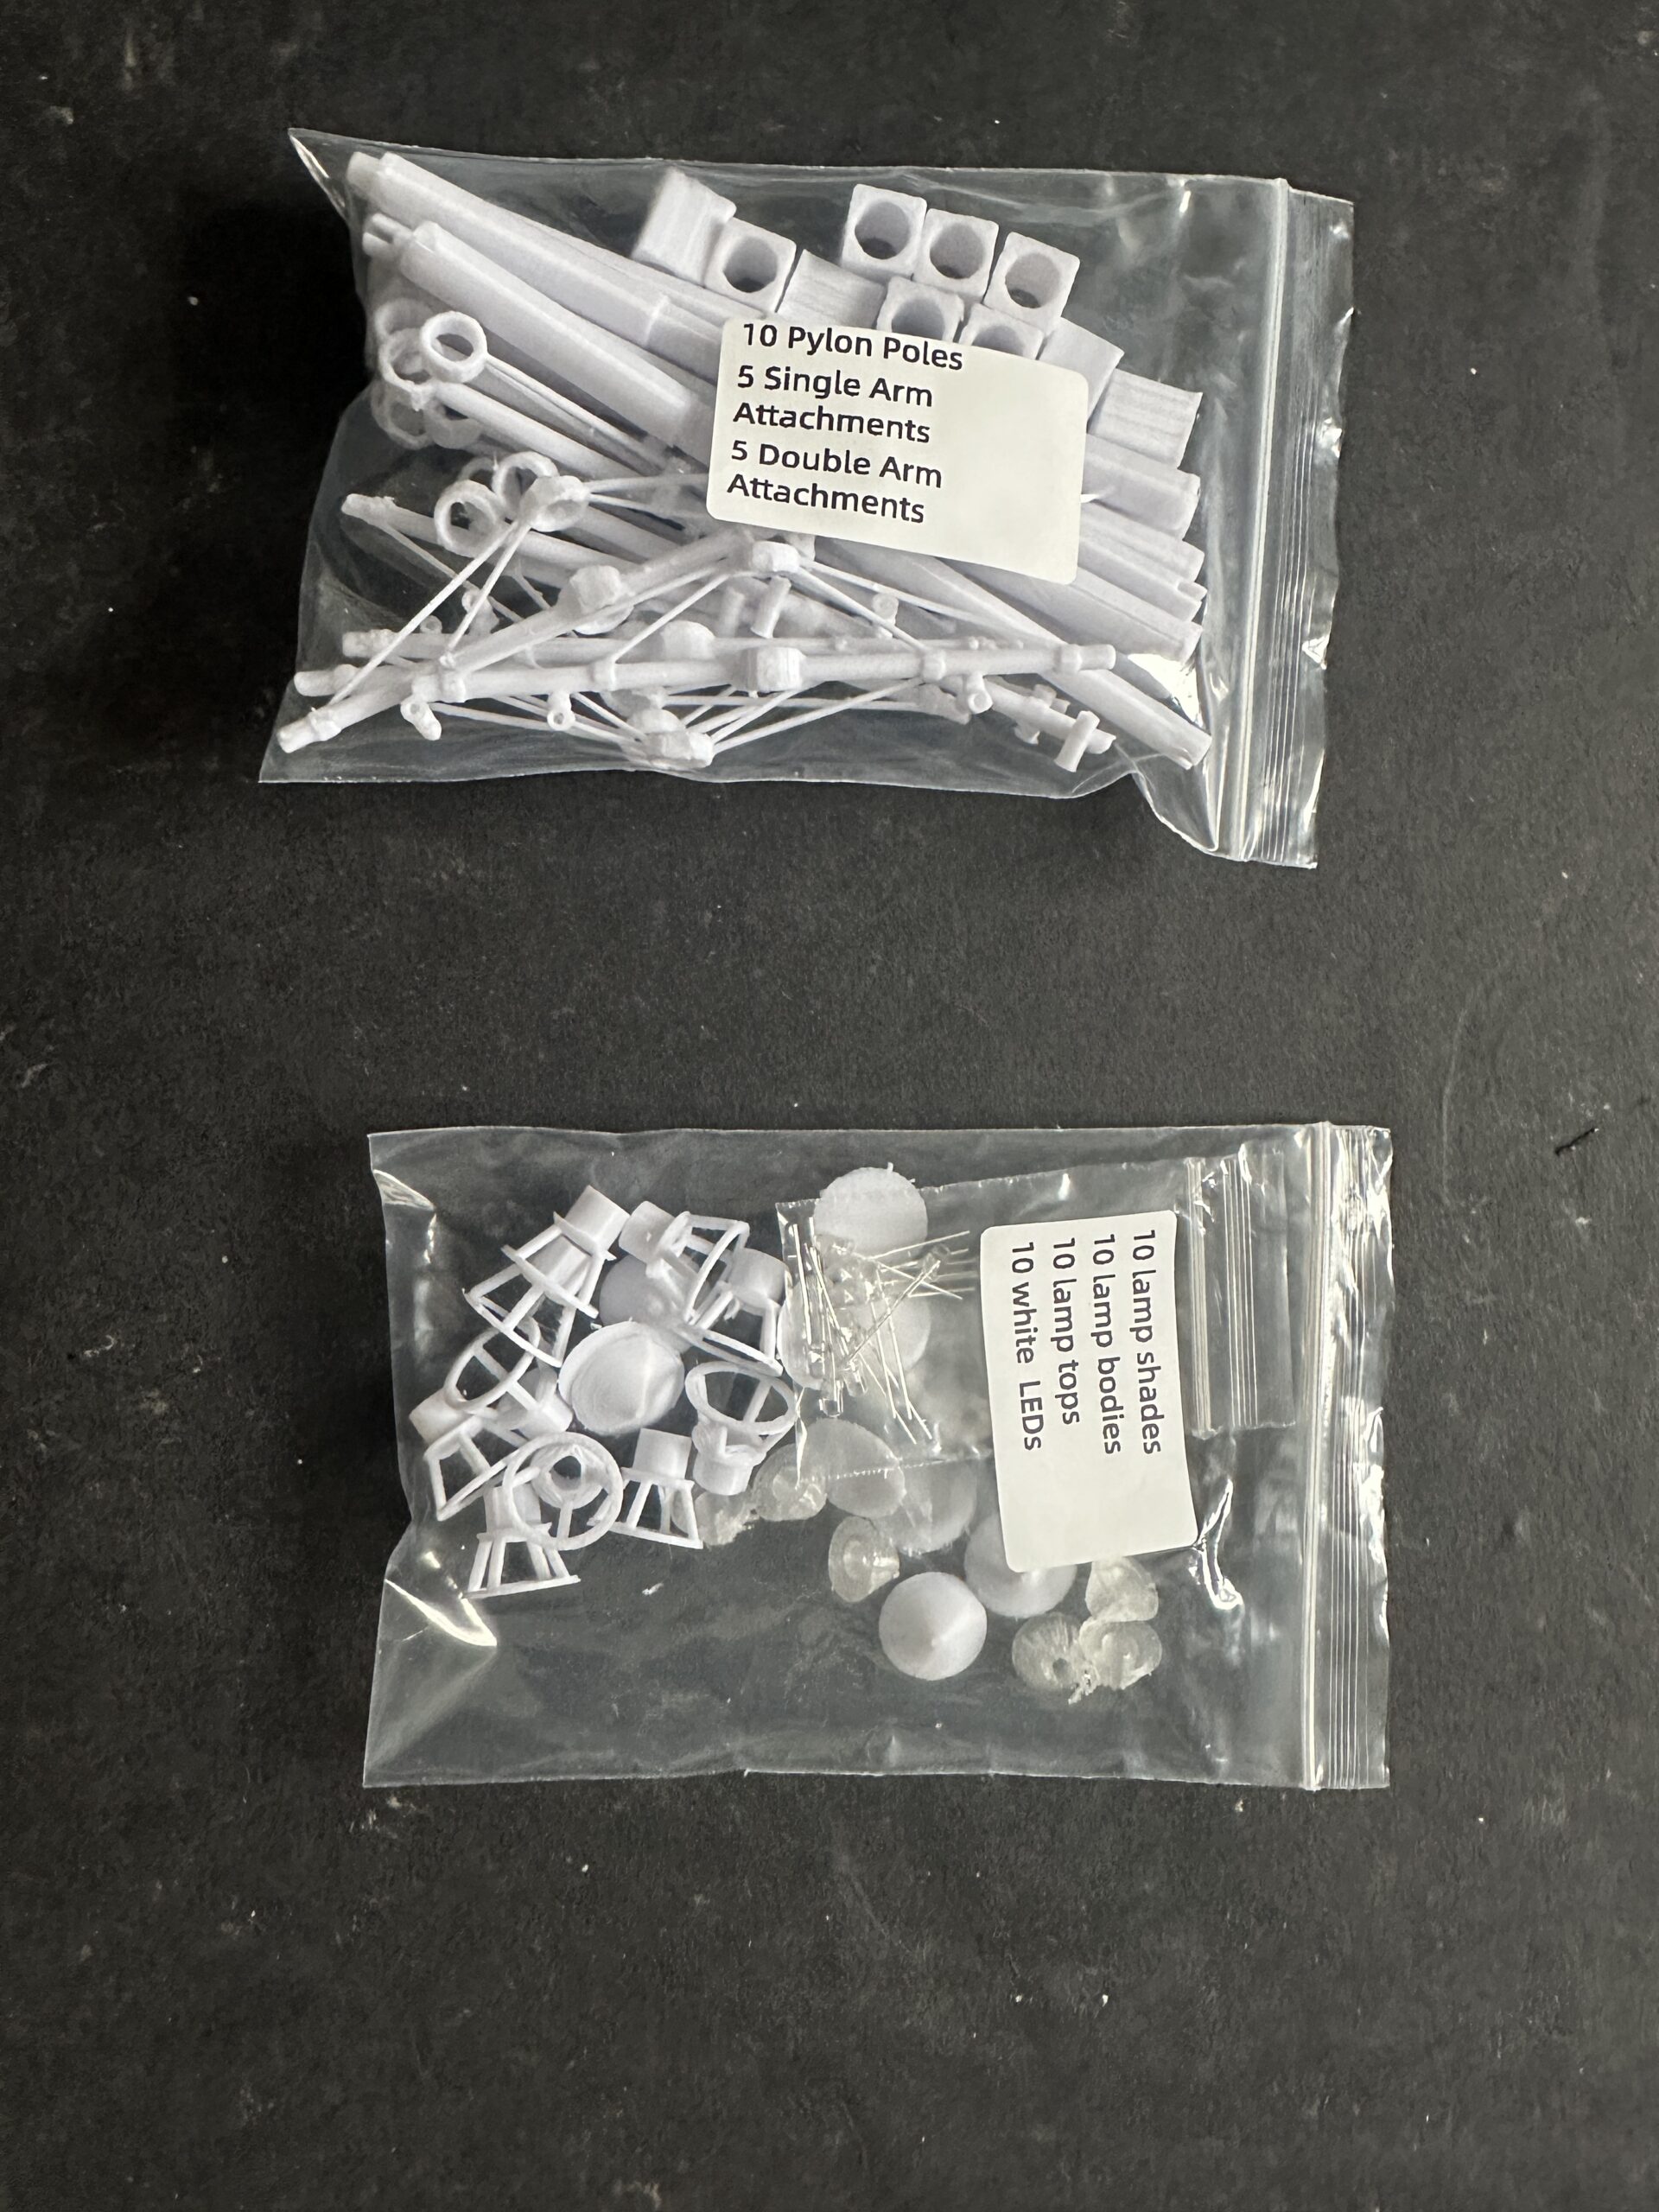
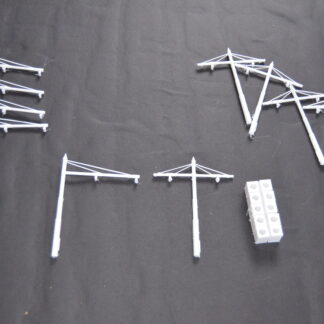
- Non-Lit Version: Includes 10 pylon poles (5 double arm and 5 single arm), 10 ball spikes (exclusive to the non-lit version), and 10 service boxes. Perfect for traditional model scenes without illumination.
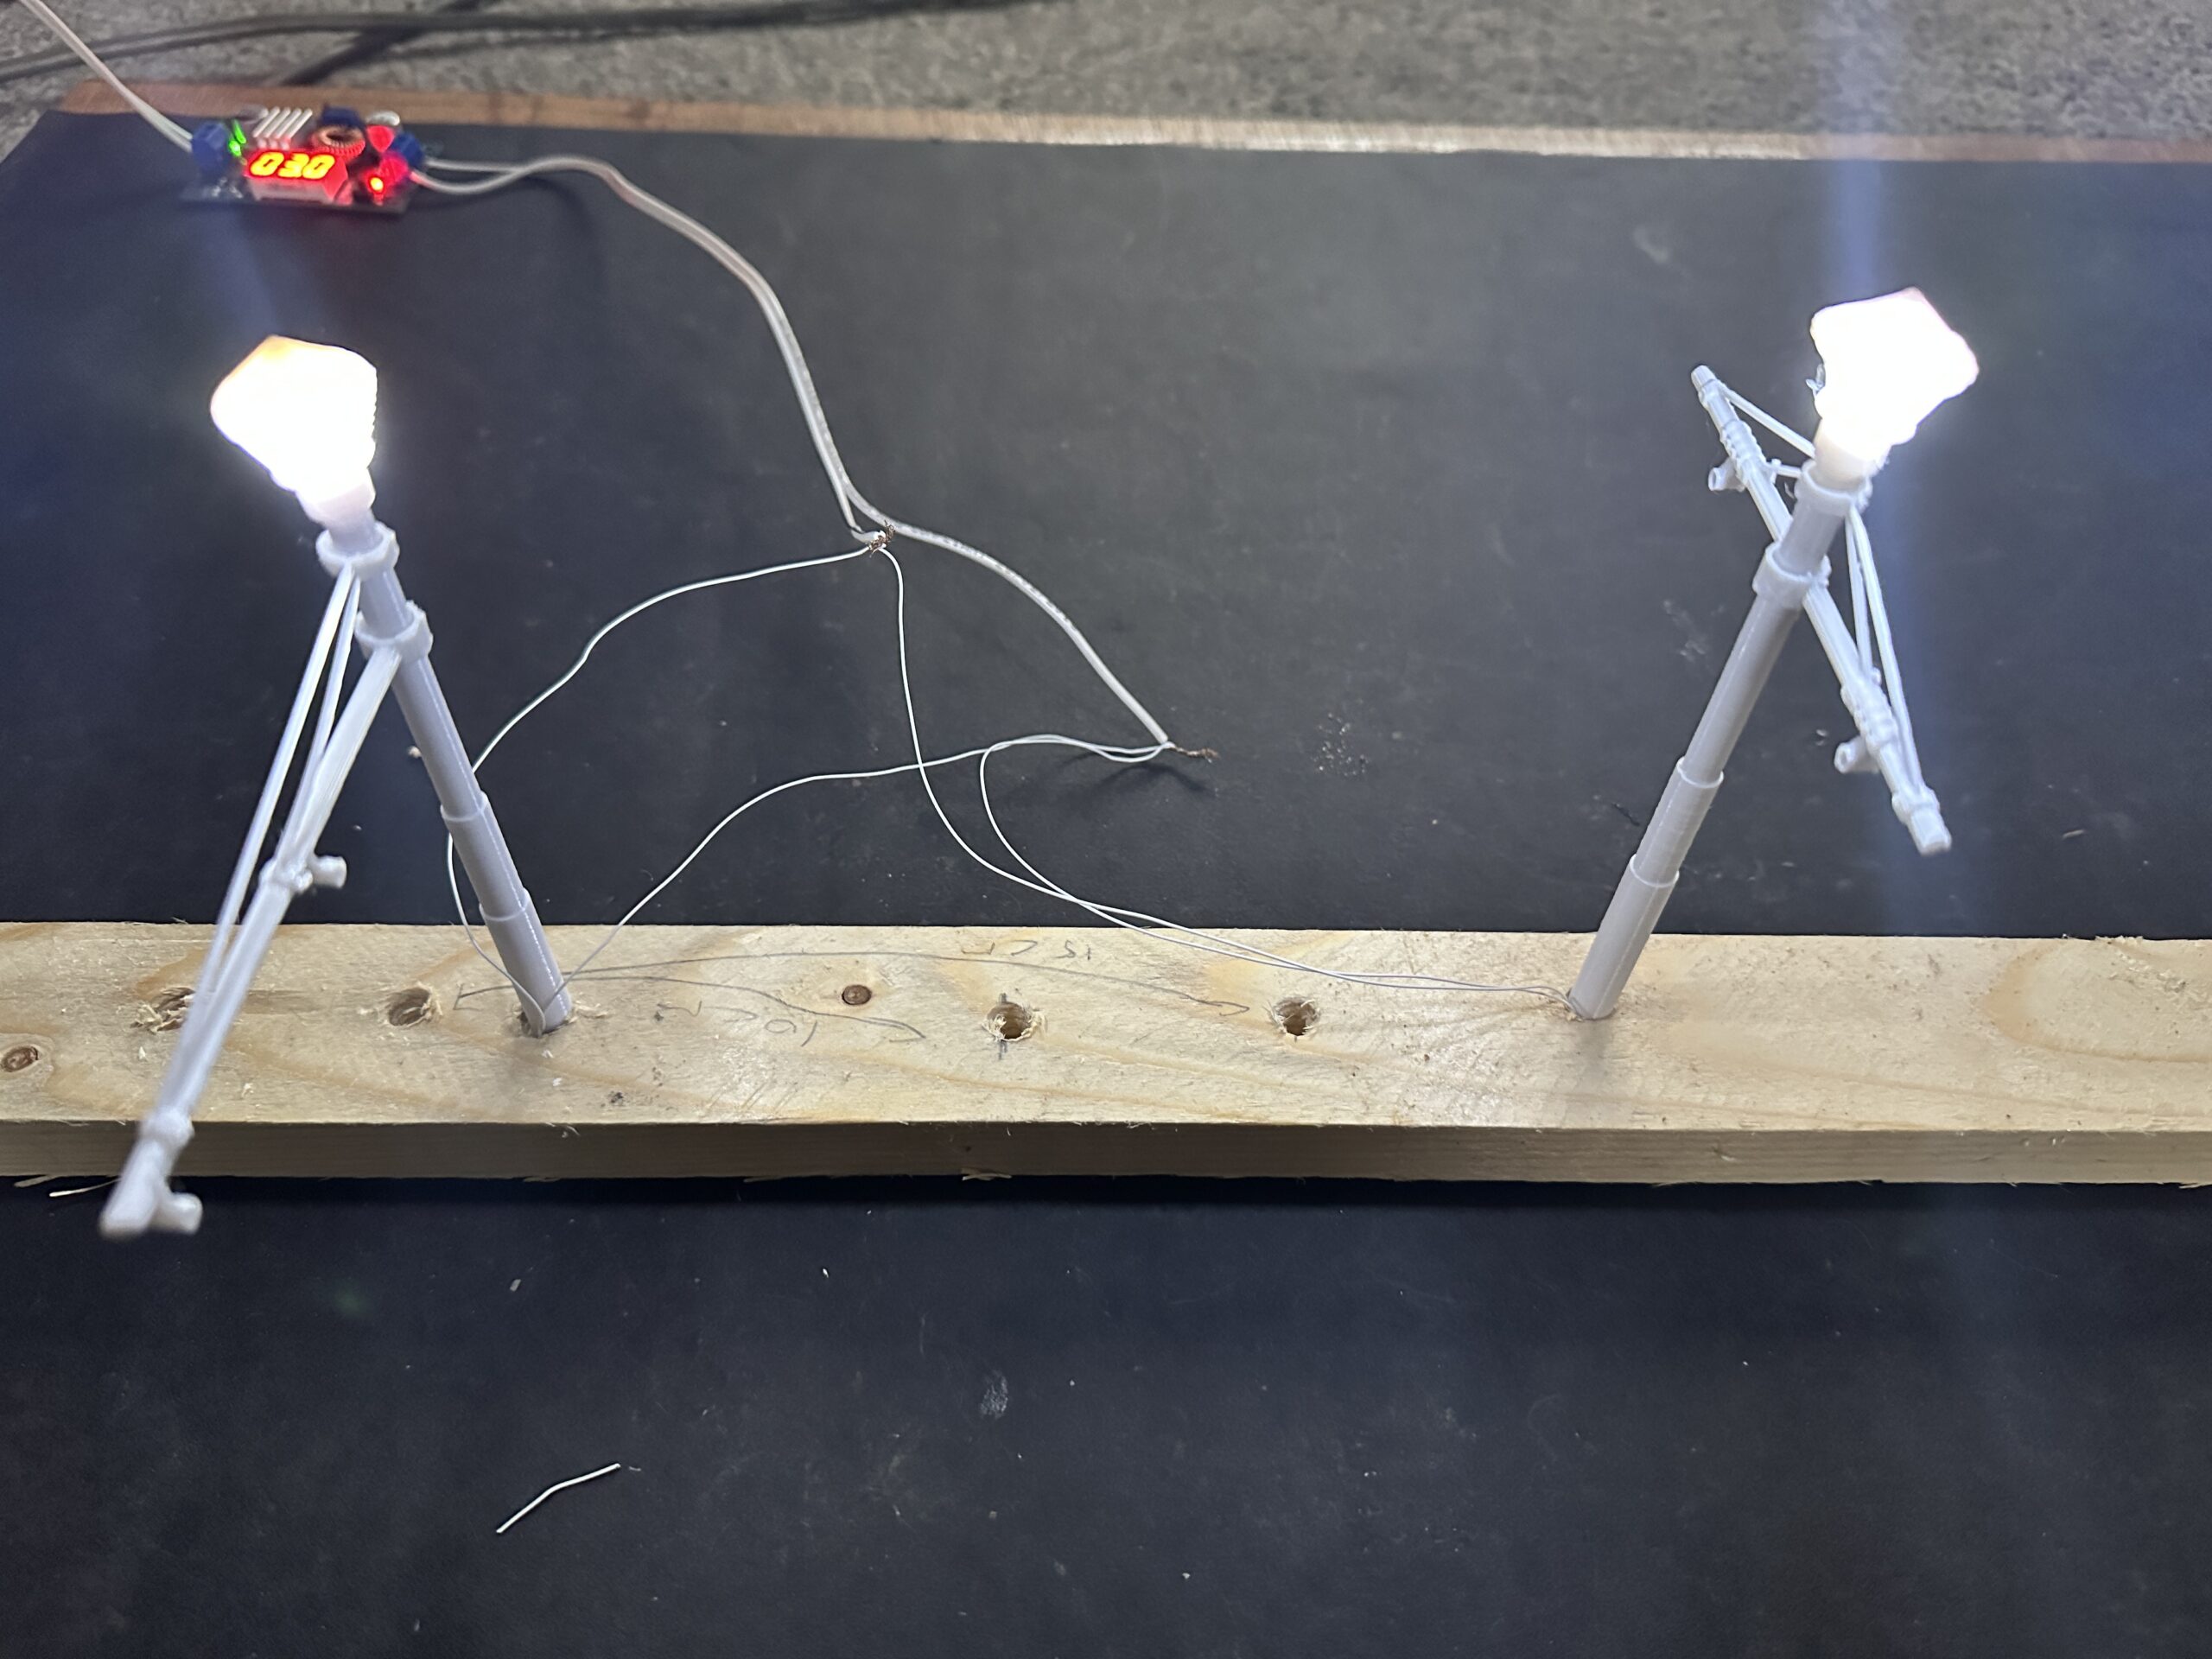
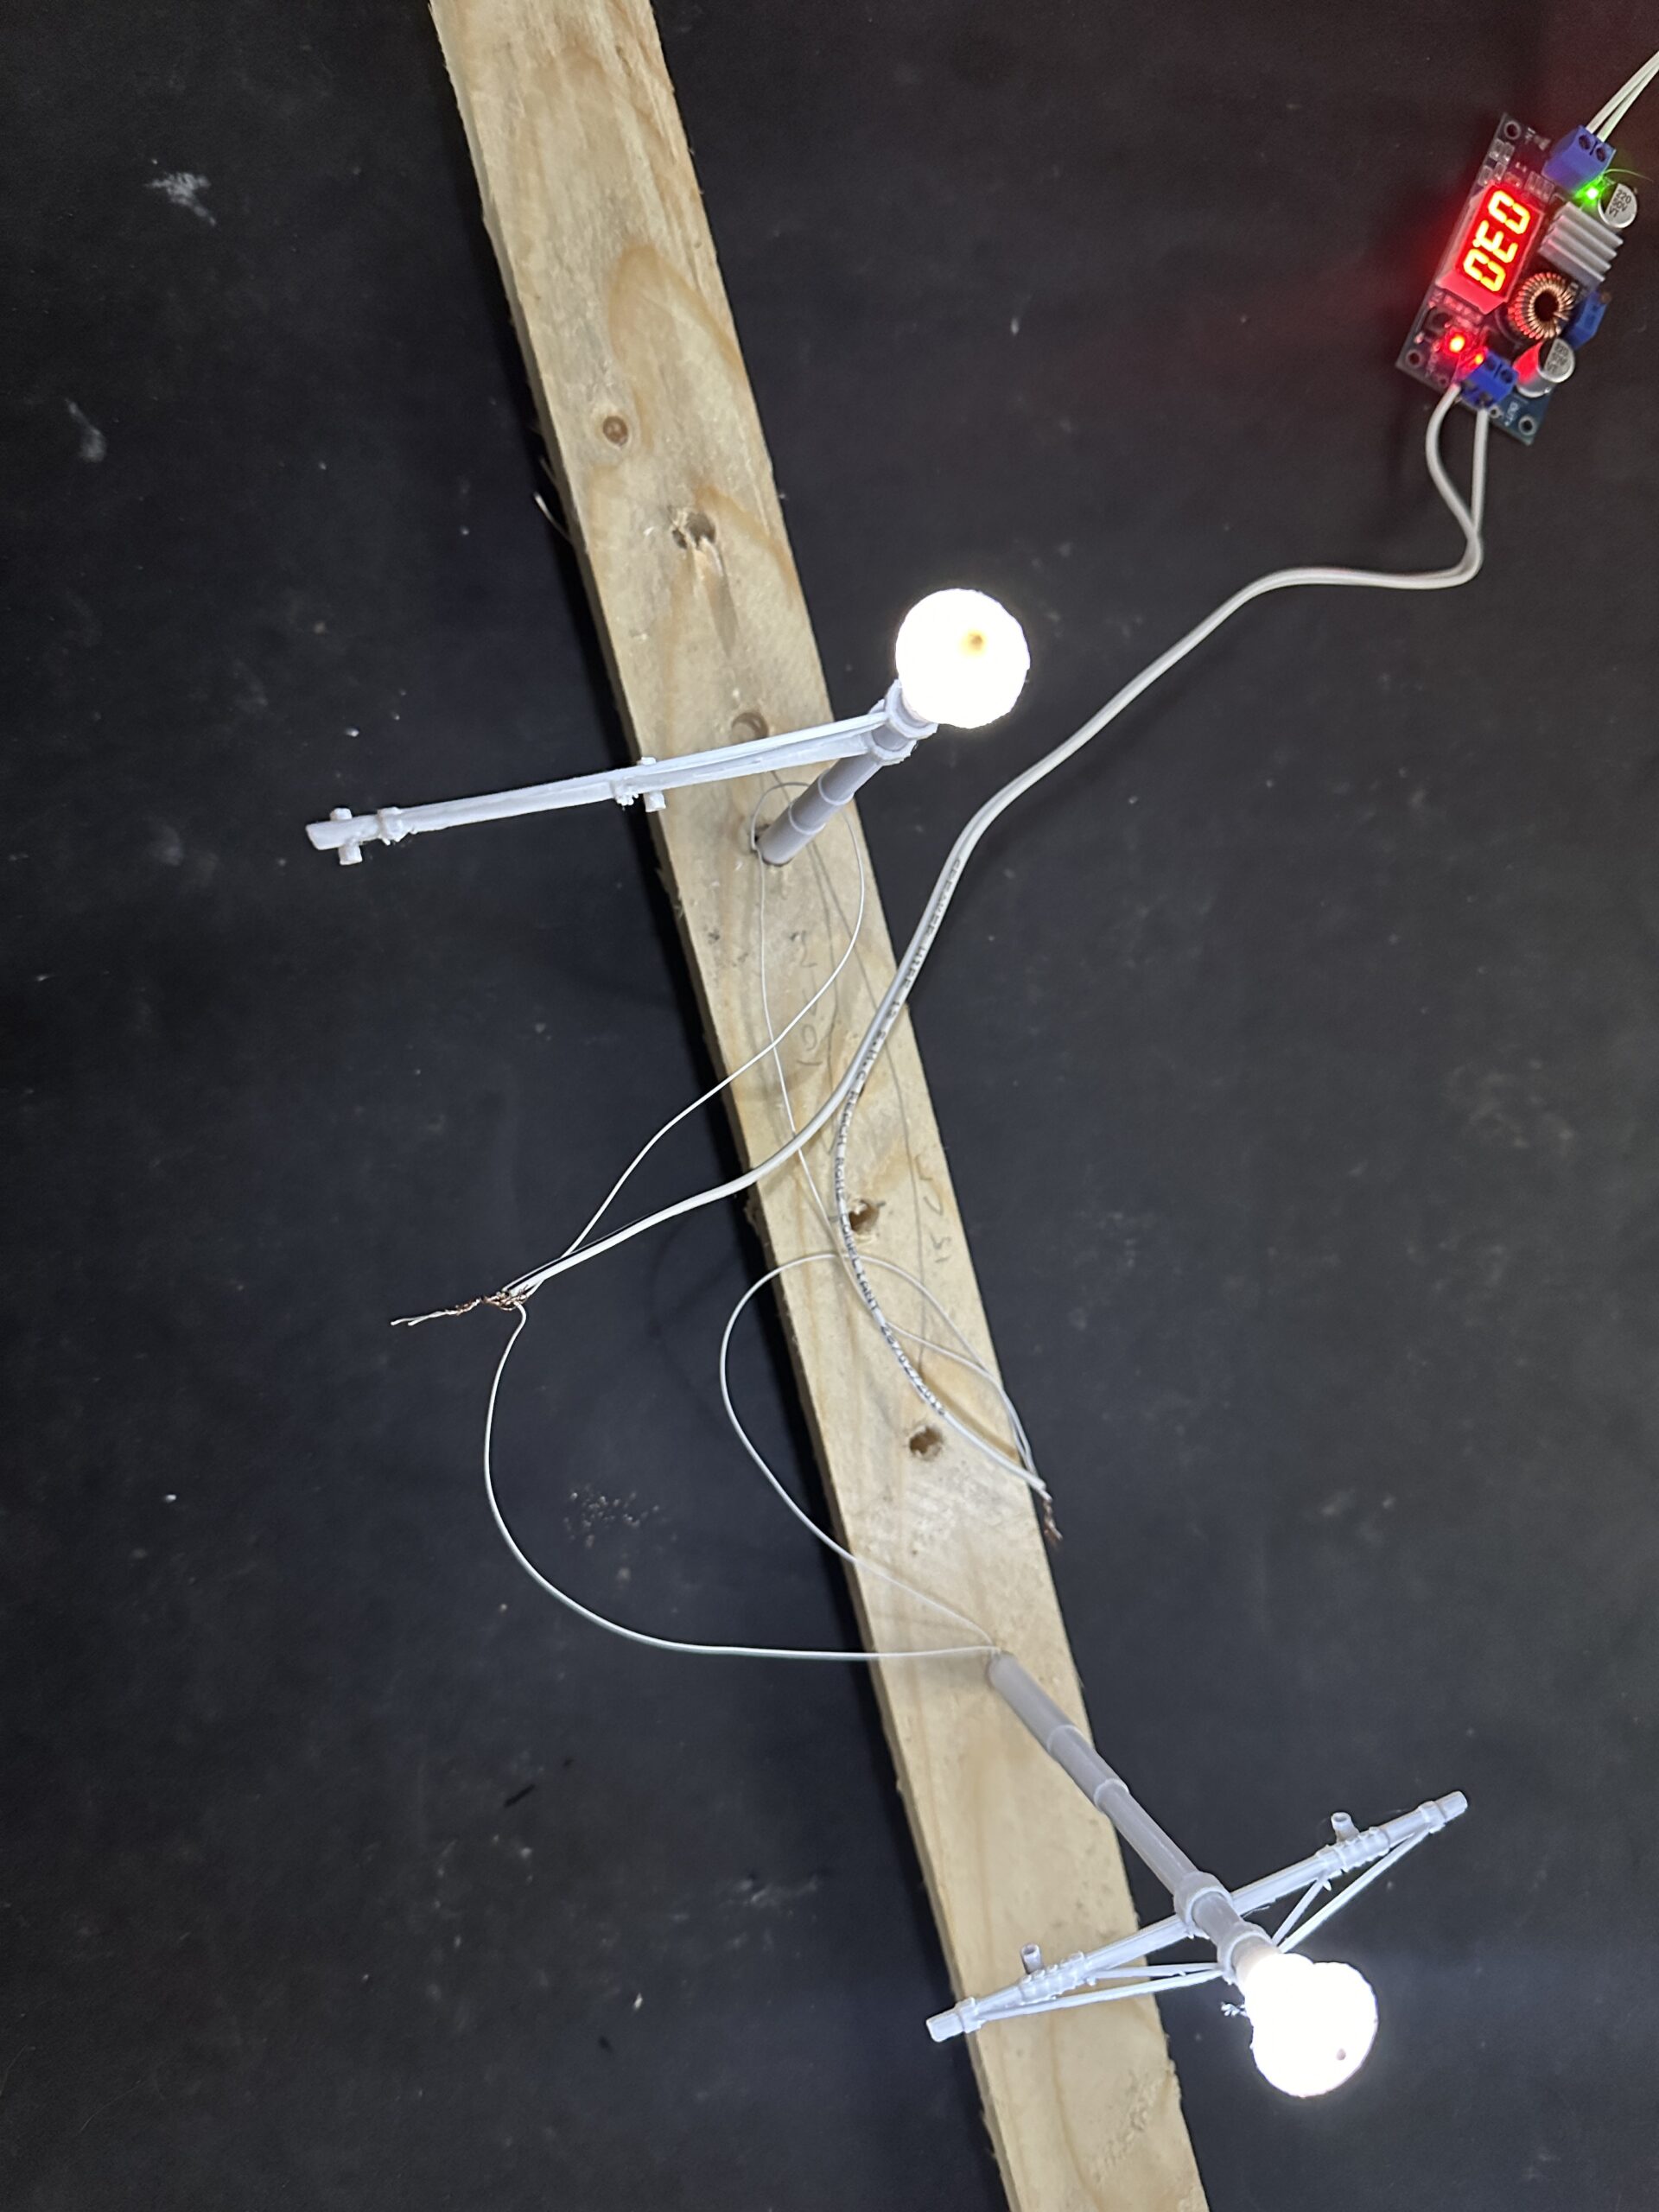
- Lit Version: In addition to the components included in the non-lit version (excluding the ball spikes), the lit version features 10 LED lights, 10 lamp shades, and 10 lamp bodies. if you also choose purchase the wire from us you will get 20 lengths of wire at approximate 10inch per length. Illuminate your model scene with captivating white LED lights for added ambiance and realism.
- Cold or Warm LEDs, option will be on the selling page
Choose Your LED Colour: Cold vs. Warm Not sure which LED colour to choose? Let us help you understand the difference:
- Cold LEDs: Emit a bright, crisp light similar to daylight. Ideal for modern scenes and creating a vibrant, energetic atmosphere.
- Warm LEDs: Emit a softer, more amber-toned light reminiscent of traditional incandescent bulbs. Perfect for creating cosy, nostalgic settings with a gentle glow.
Assembly Instructions:
- Non-Lit Version: Light sanding and painting are required. Follow these assembly instructions:
- Glue the arm at your desired height.
- Attach the top ball spike cap.
- Glue the service box at the base of the pylon if desired.
- Lit Version: Follow these assembly instructions:
- Glue the LED into the lamp shade.
- Optional ….It helps to glue some tinfoil to the top of the lampshade stops the light bleeding into the top of the lamp and gives better reflection of light back down onto the layout.
- Cut the LED legs down so you have about 3mm of leg left on the LED
- Solder the wires to the legs of LED (see section below about soldering LED)
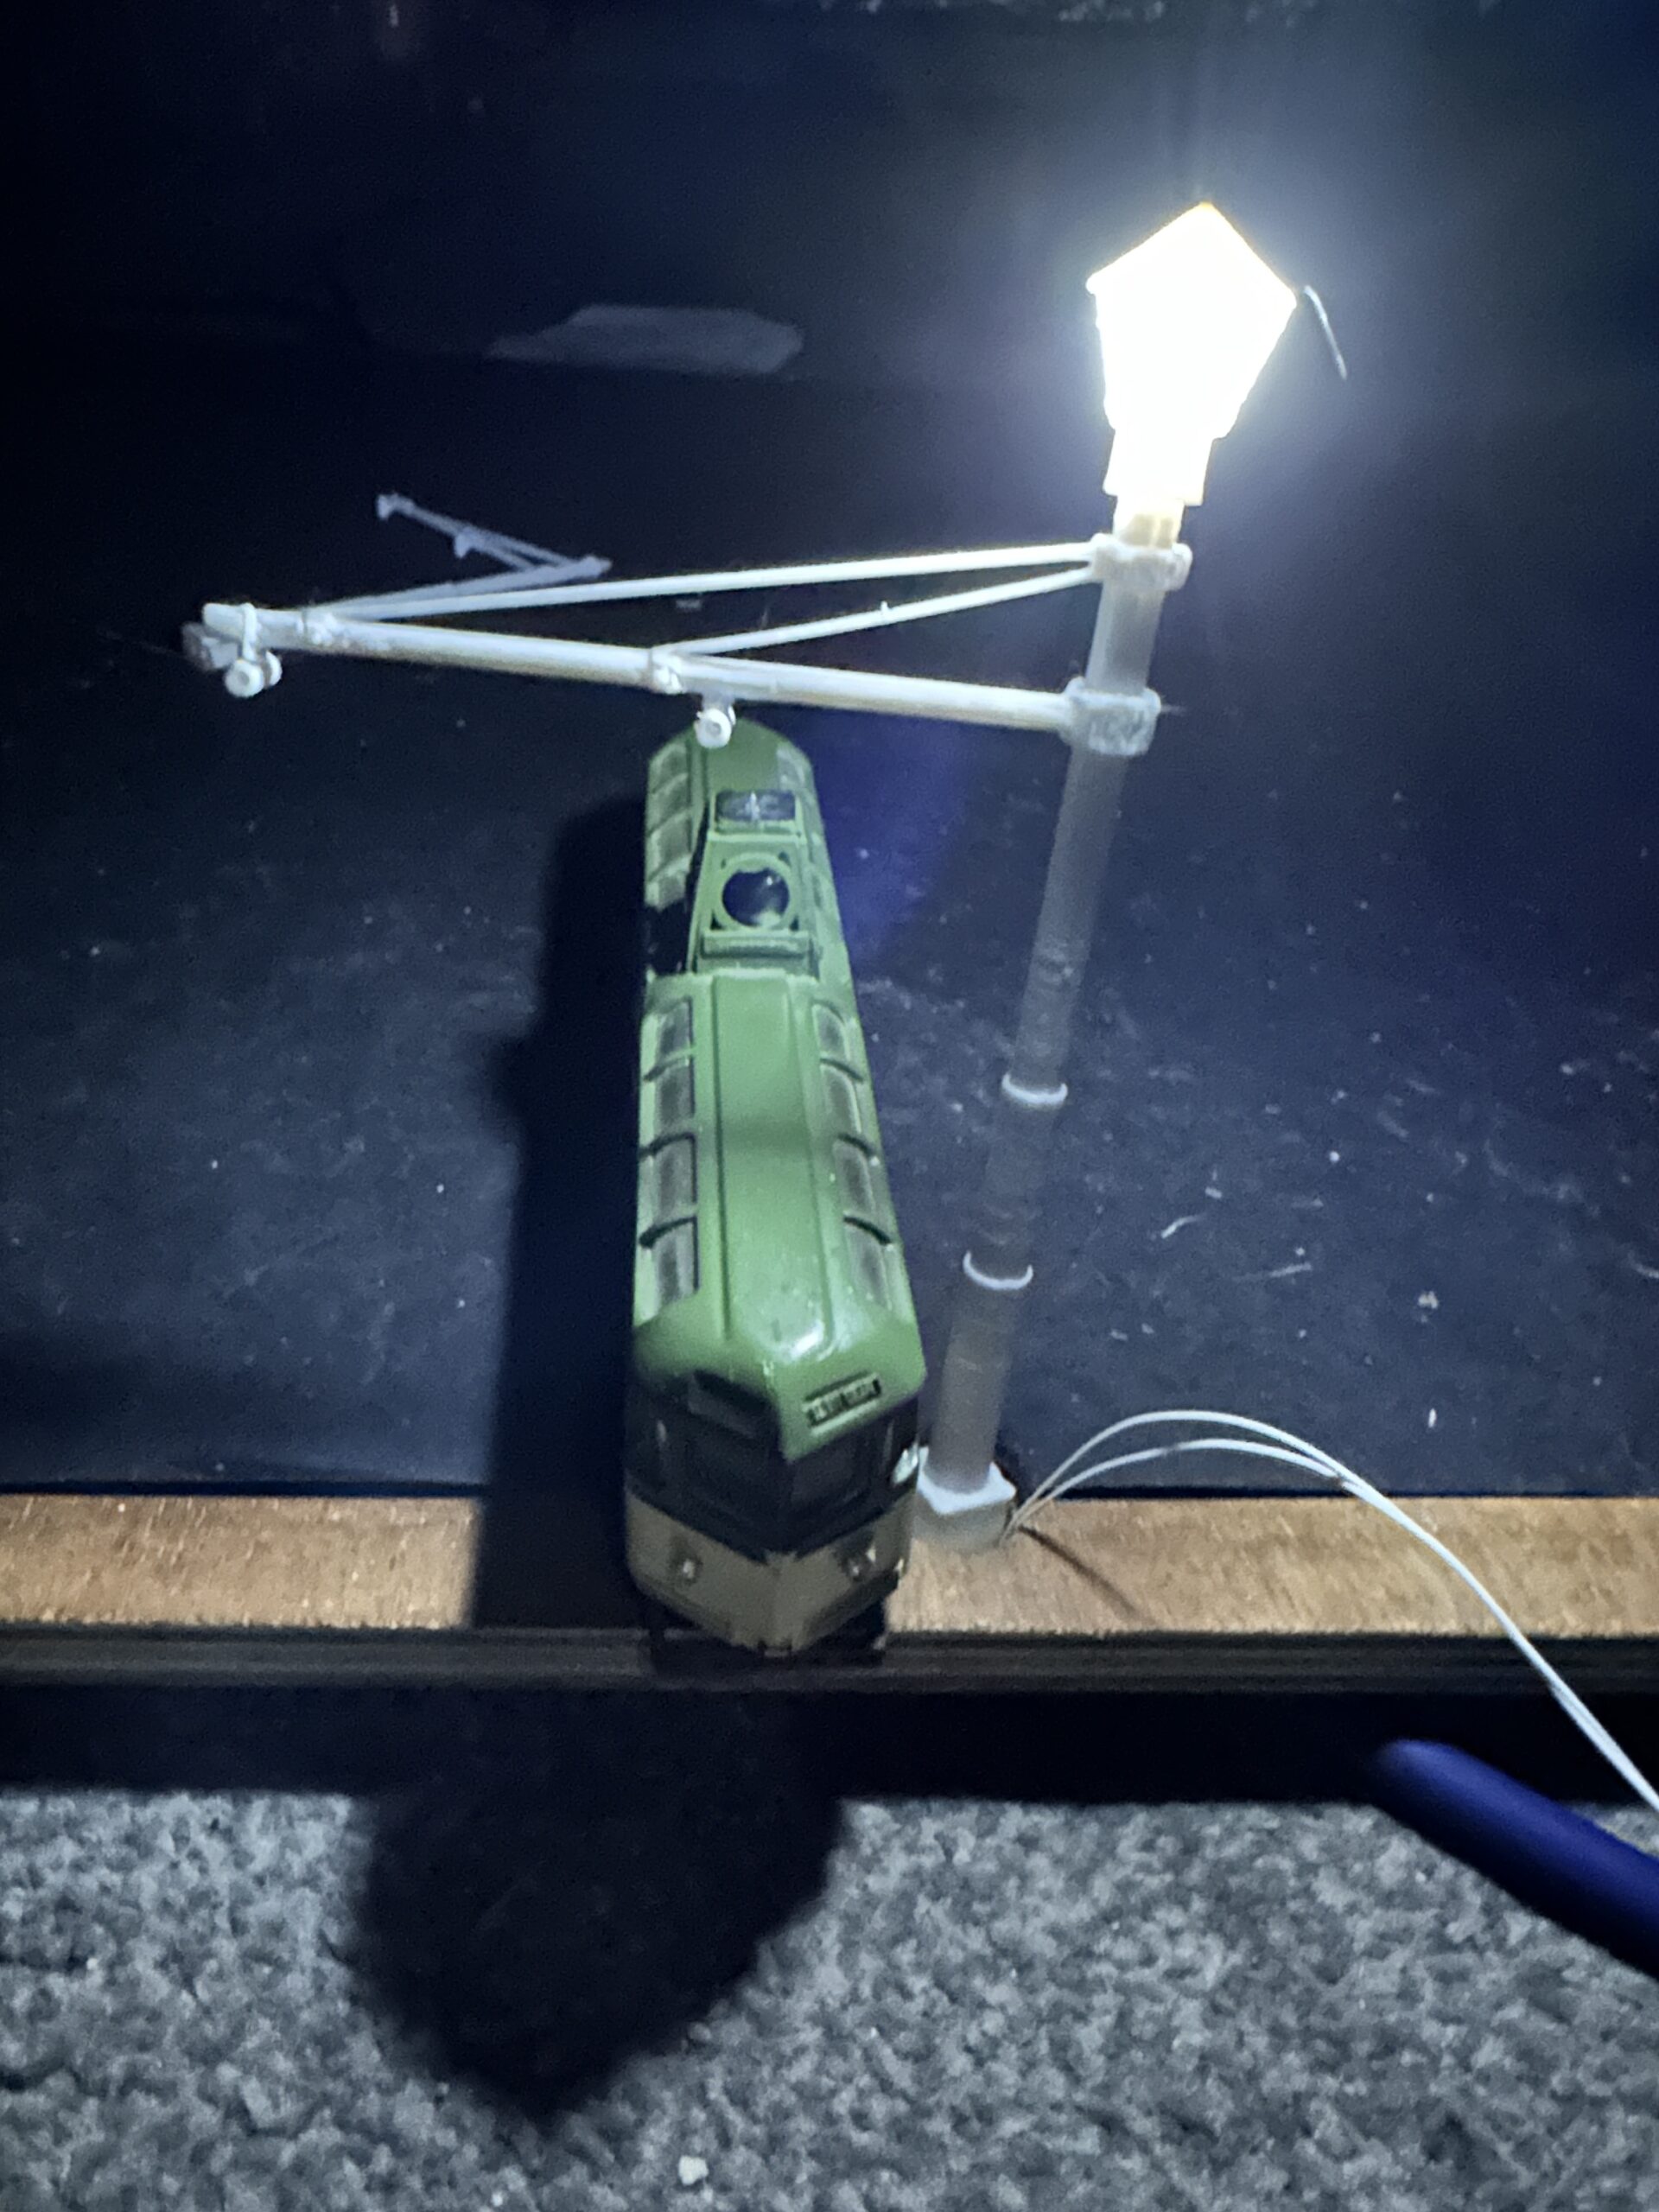
- Attach the lamp shade to the lamp top.
- Thread the wire down through the centre of the pylon (twisting wires together may aid in this).
- Glue the lamp upper body to lower body. Please note that the spike ball for the top of the pylon pole is not used in the lit version.
A Glimpse into History:
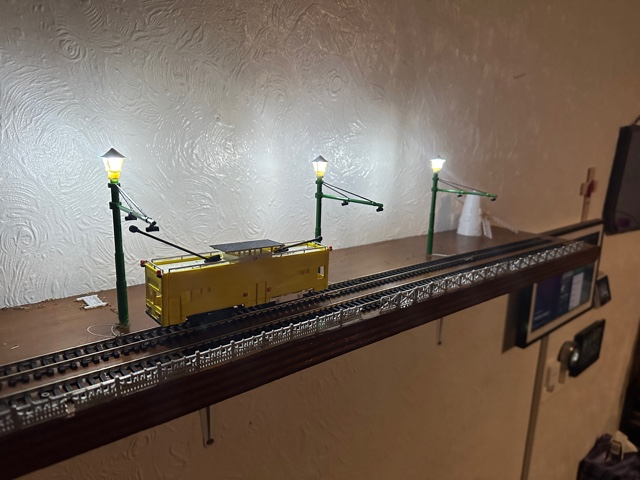
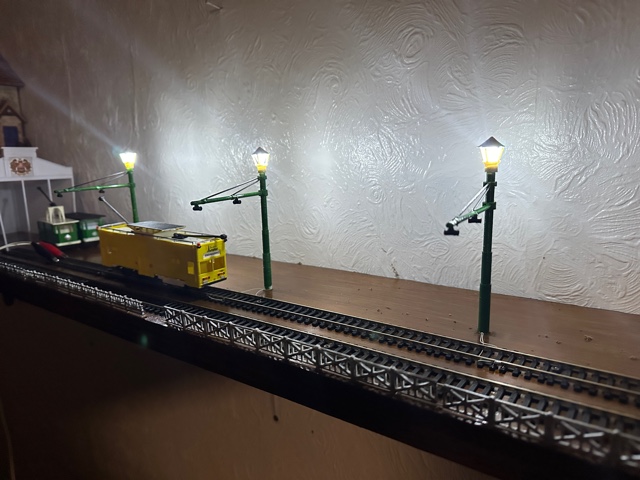
Delve into the rich history of tram transportation with a special nod to Blackpool, a seaside resort town in England famous for its iconic tramway system. The distinctive pylons featured in our kit pay homage to the heritage and charm of Blackpool’s tramway network.
Additional Notes:
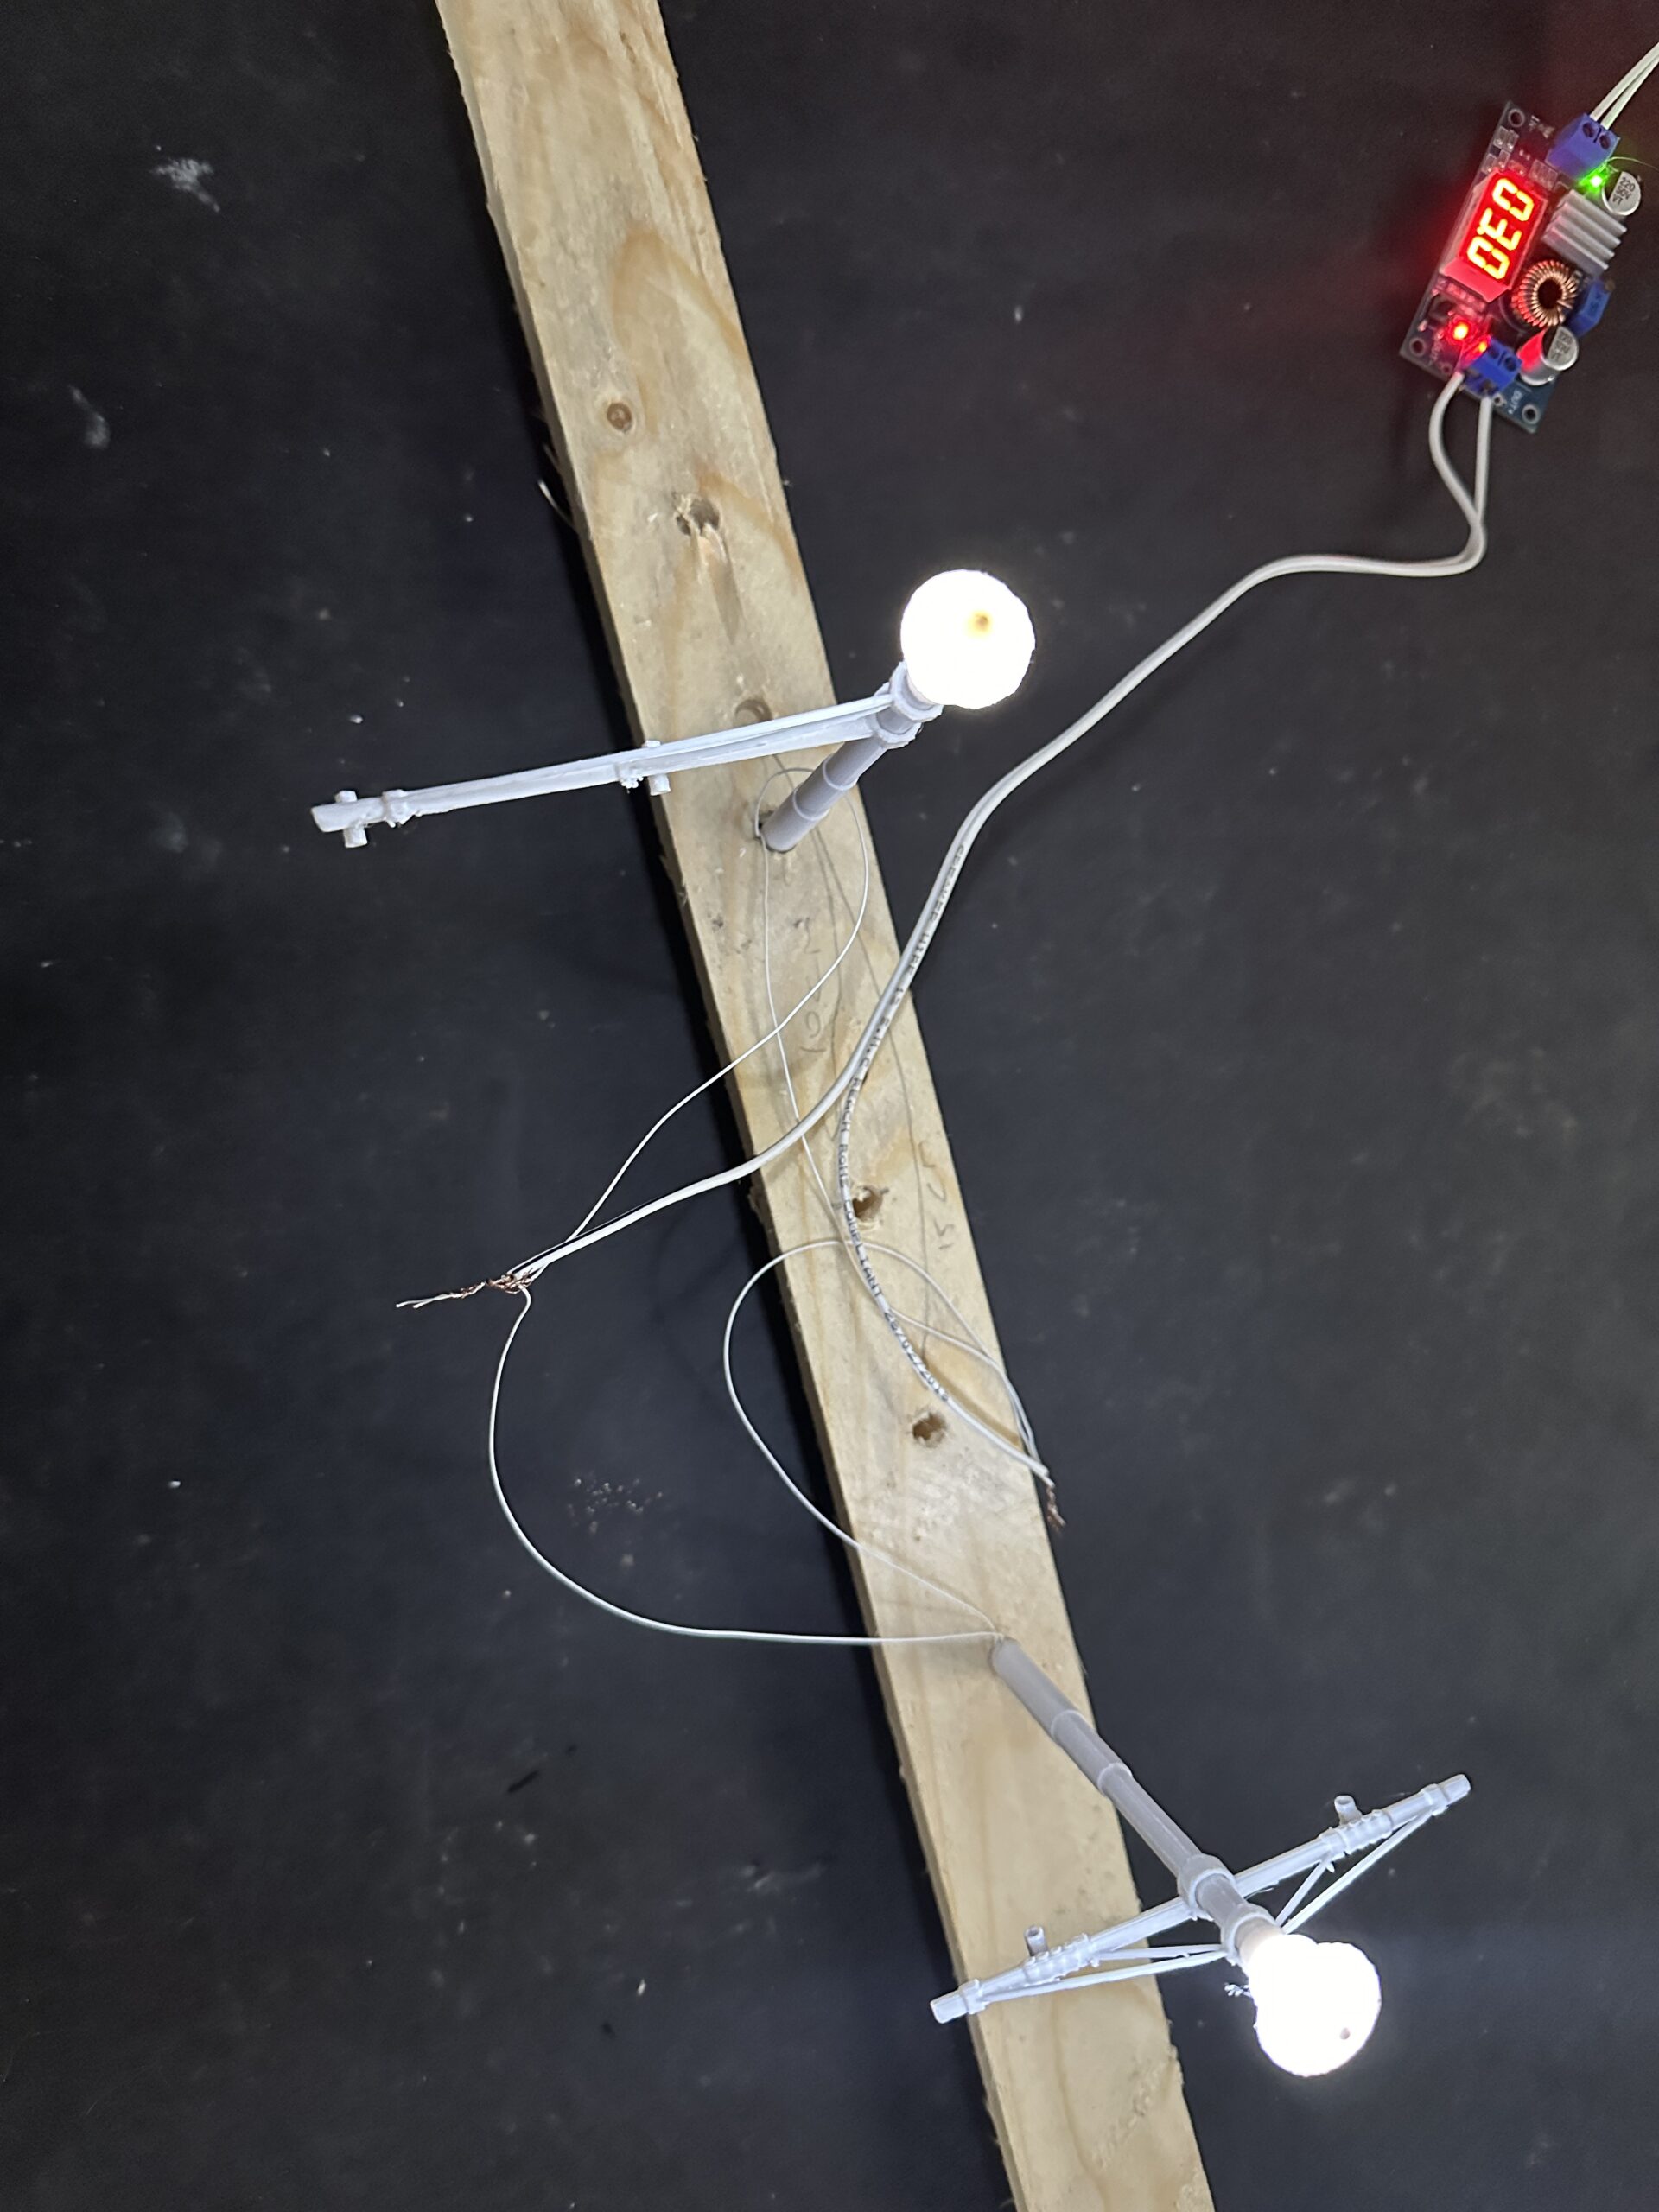
- LED in the kit are 3v LED. If using on any other DC voltage, please use the correct resistor on each LED.
- We power LEDs on our layout with a Buck Convertor.
- If wire is not ordered from us, the wire gauge needed is AWG30 or similar to fit through the pylon hole.
- All LED lights are tested to ensure they are working before being shipped out.
Steps to Solder Wires to LED:
- Prepare the LED: Identify the polarity of the LED. Typically, the longer lead is the positive (anode) terminal, and the shorter lead is the negative (cathode) terminal. Refer to the datasheet or manufacturer’s specifications to confirm the polarity.
- Prepare the Wires: Strip a small length of insulation from the ends of the wires to expose the bare metal.
- Tinning: Apply a small amount of solder to the tip of the soldering iron. Then, touch the soldering iron to the exposed wire end to heat it. Once heated, apply solder to the wire until it’s coated evenly. This process is called tinning and helps to improve conductivity and promote solder flow during the final connection.
- Soldering: Position the tinned wire against the correct terminal of the LED (positive to positive, negative to negative). Hold the wire in place with a helping hand tool or similar device. Touch the soldering iron tip to the junction of the wire and LED terminal, heating them both simultaneously. Once heated, apply a small amount of solder to the junction. The solder should melt and flow around the connection, creating a secure bond. Be careful not to overheat the LED, as excessive heat can damage it.
- Inspect the Connection: After soldering, visually inspect the connection to ensure that the solder has flowed smoothly and evenly around the joint. Check for any cold solder joints or bridges between adjacent connections. Use a multi-meter set to the continuity test mode to verify that there is electrical continuity between the wire and LED terminal.
- Repeat: Repeat the soldering process for any additional wires or LEDs needed for your project, ensuring correct polarity and secure connections throughout.
By following these steps and taking care to ensure correct polarity and secure solder joints, you can effectively solder wires to LEDs for your electronic projects. Remember to work in a well-ventilated area, observe proper safety precautions, and practice good soldering techniques for the best results.
Illuminate and elevate the ambiance of your model scene with the oo3dmodels Version 2 Pylons Kit.
Order yours today from the oo3dmodels shop
Acknowledgement and Thanks to Ian (@Wessy57)
On behalf of oo3dmodels, we would like to extend our heartfelt thanks to Ian (@Wessy57) for his invaluable idea and input on the lit version of our pylons. Ian’s creative vision and insight have been instrumental in enhancing our product offerings and bringing innovative solutions to our community of model enthusiasts.
Martin
oo3dmodels founder
Copyright Notice
© 2024 oo3dmodels. All Rights Reserved.
This product, including all associated designs, images, and models, is the property of oo3dmodels. Unauthorized reproduction, distribution, or use of this product or any portion of it may result in severe civil and criminal penalties and will be prosecuted to the maximum extent possible under law. The oo3dmodels Blackpool lit and non-lit pylons and related intellectual property are protected by applicable copyright and trademark laws.
For permission requests, contact:
oo3dmodels
Email: enquires@oo3dmodels.com
Thank you for respecting our intellectual property.
Ian West (verified owner) –
Well, I just took delivery of two ‘new version’ kits for warm white and… Martin has retooled these very well. Crisper prints and clearer detailing throughout combined with the modular form have produced Promenade street furniture that would actually look equally good on any town layout. A clear improvement on the original form and very welocome.
Blackpool Tram –
Just Got My LED Tramway Poles….!,
I Absolutely Love Them…..!,
Excellent For The Price…… !,
They Will Greatly Inhance My Blackpool Model Tramway….!
Well Made……!
Thanks Martin For A Another Great Product….!
👍👍